To call this blog post a recipe would be a bit of an understatement. Designed for inexperienced bakers (like me!) this recipe is really a guide for your adventure in making the most beautiful gluten-free birthday cake you have ever seen!
Some of the links on this post are affiliate links. To learn more, visit our Disclosures.
Don't be overwhelmed by the following SIX DAY (what?!) guide. This is just to make it easy for you to accomplish taking on a manageable piece of the project each day. If you are a last-minute go-getter, feel free to tackle it all at once!
Table of Contents:
- Uni-Pega-Mer-Kitty Birthday Party Theme
- Gluten-Free Party Food
- Uni-Pega-Mer-Kitty Party Supplies
- Uni-Pega-Mer-Kitty Birthday Party Activities
- Gluten-Free Uni-Pega-Mer-Kitty Cake Recipe (6-Day Guide)
- Shopping Guide
Uni-Pega-Mer-Kitty Birthday Party Theme
As her birthday rolls around each year, Miss E and I had the usual conversation that always starts with, "what kind of birthday party would you like?"
This year, her response, "a Uni-Pega-Mer-Kitty party, Mom," may have well been Greek to me. After Miss E laid it out for me in plain terms, I understood that it is a unicorn-pegasus-mermaid-kitten, four creatures wrapped into one.
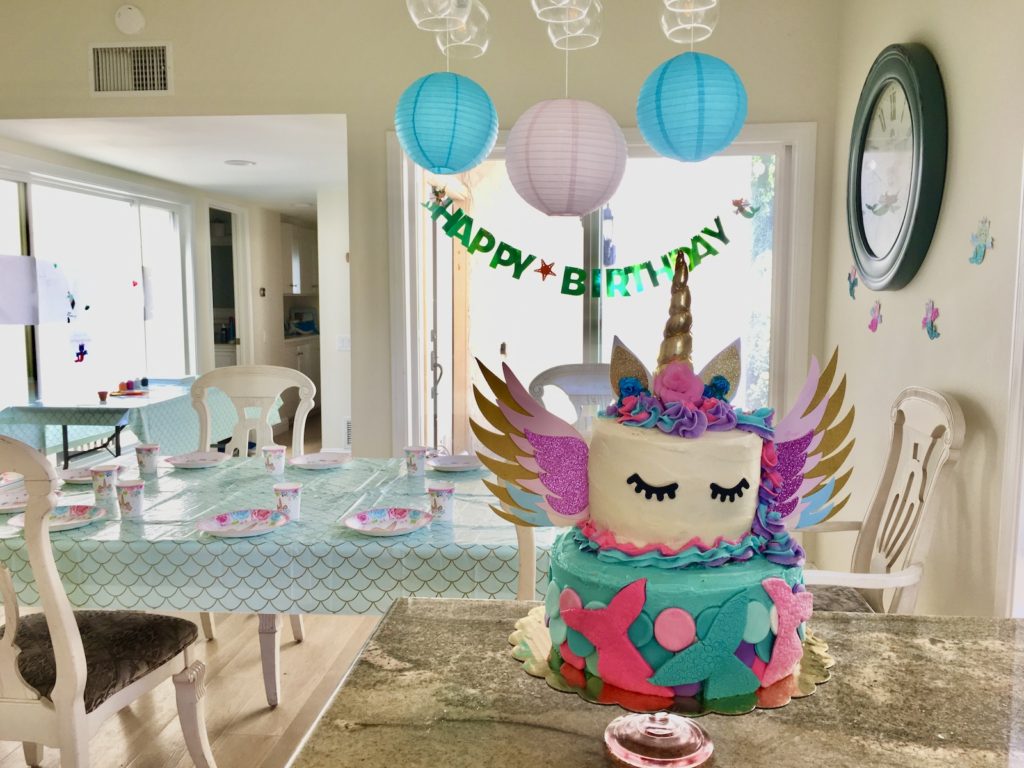
I also understood that, despite the lack of existence of any Uni-Pega-Mer-Kitty party supplies, all four together were to make their presence known in every element of her birthday party: from the decorations to the cake. Especially the cake.
A few years earlier at our Superhero Birthday Party, I had figured out that decorate-your-own-gluten-free-cupcakes were a fun-for-the-kids and easy-for-me birthday party hack. But, no, this year, it HAD to be a Uni-Pega-Mer-Kitty CAKE. And, unfortunately, Miss E did not like the taste of the cakes at our local gluten-free bakery.
After a few desperate attempts to get myself out of Miss E's vision of a two-tiered masterpiece, by trying to convince her that Uni-Pega-Mer-Kitty cupcakes would be So. Much. Fun. I surrendered and threw myself into Pinterest and google searches.
Like many a celiac mom before and since I rolled up my sleeves and took on a multi-day gluten-free birthday cake baking endeavor. If I can do it, you can do it. I am not a baker. I had never made a tiered cake, a well-decorated cake, nor gluten-free fondant. I researched a lot and broke everything down into manageable steps to complete each day. Bragging rights here, I did an amazing job! It was stunning and delicious!
So whether your theme is merkitty, unikitty, catmaid, mermicorn, pegacorn, pegacat, (you get the idea), or the all-encompassing Uni-Pega-Mer-Kitty, feel free to use my plan or pick and choose the parts that fit your fantastical creature.
If you are just here for the cake, you can jump ahead to read the steps I took each day to break the project up over about a week. Or read on for more party details.
Gluten-Free Party Food
Because all of my attention was on the Uni-Pega-Mer-Kitty Cake, I wanted all the other elements of the party to be simple. I helped Miss E brainstorm easy, kid-friendly food. She opted for Ora-Ida french fries, which are labeled gluten-free, and gluten-free chicken strips. It was simple to throw these items on large baking sheets and put them in the oven as guests arrived.
Reminder to double-check the gluten-free label on packaged food! My mantra is "every label, every time." But, nobody is perfect. We had a near miss with gluten when I mixed up the gluten-free and regular chicken strips at the store. I had already placed the chicken strips on the baking sheet when I had that nagging feeling to check the package, which I had already discarded. Sure enough, I had purchased the wrong ones, and almost glutened my daughter at her own birthday party. A thorough cleaning of the baking sheet and a quick run to the store by my husband, and we were back in business. Crisis averted.
We added a fruit tray and veggie tray to the table and dinner was served.
Uni-Pega-Mer-Kitty Party Supplies
As you can imagine, there were no Uni-Pega-Mer-Kitty party supplies to be found. I had fun cobbling together a combination of supplies each stand-alone theme.
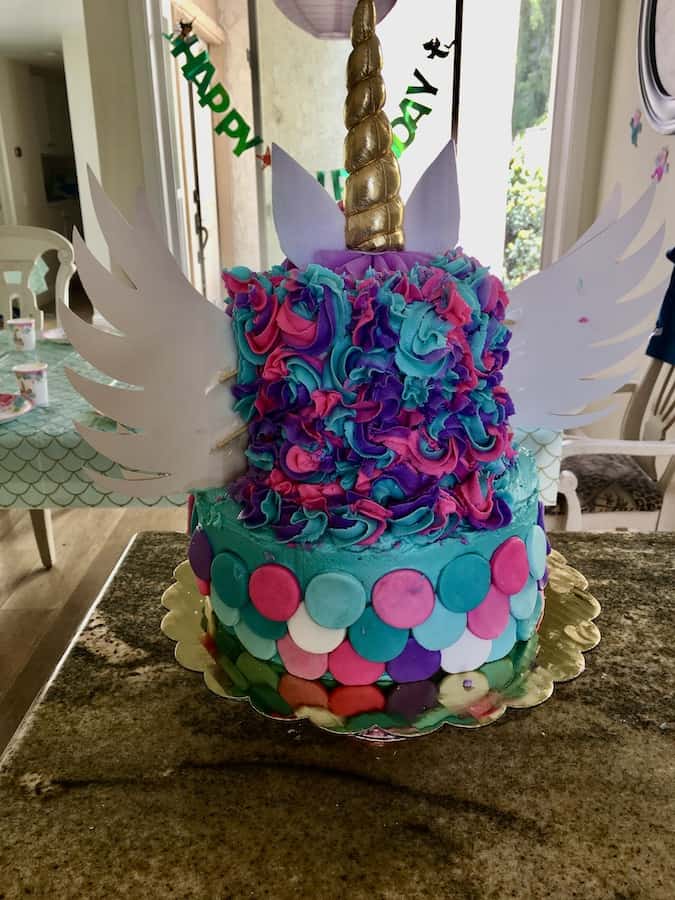
A leftover "Happy Birthday" banner from a previous mermaid party fit in, once I added free-cut wings and horns. Similarly, I found uni-kitty papers that I modified with mermaid tails and wings.
Mermaid scale table covers from Target dovetailed with Unicorn-themed tableware from Amazon.
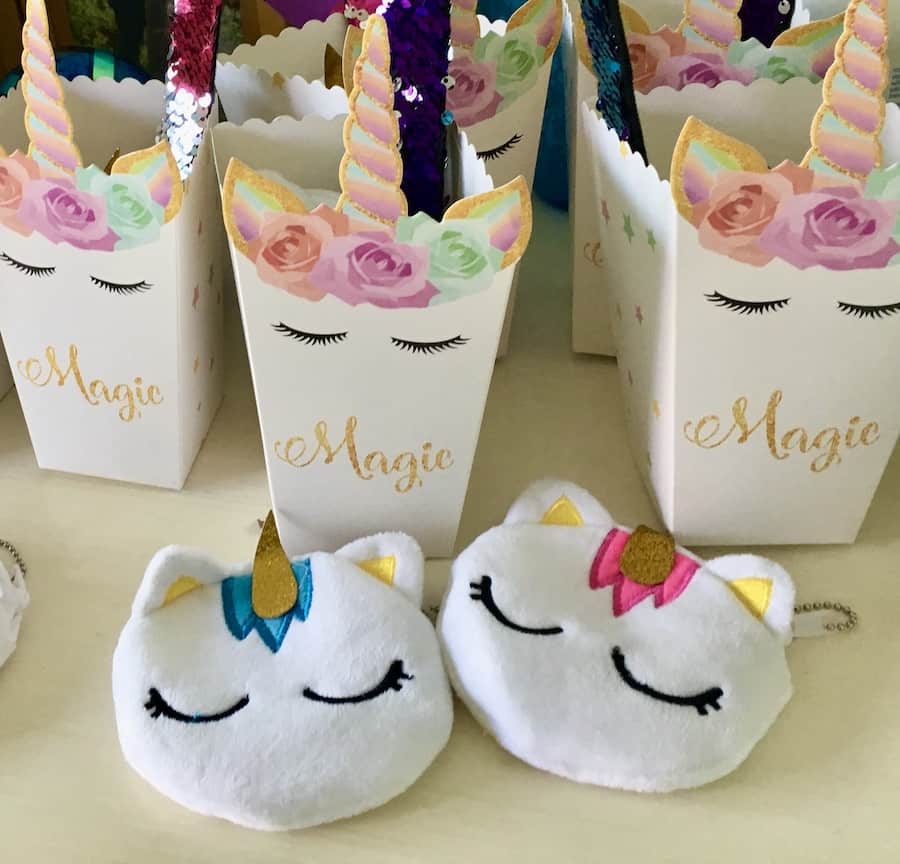
There is no shortage of party favors for each separate theme, so we combined a few, including mermaid bracelets and uni-kitty coin purses, in unicorn popcorn boxes. The coin purses that we selected are out of stock. These uni-kitty coin purses are currently available, and there are endless combinations of party favors in each of the four themes and their various combinations.
We also had mermaid sequin pillows, which doubled (tripled!) as decorations, fun-but-not-so-comfy-pillows for the sleepover, and additional party favors for the kids who slept over.
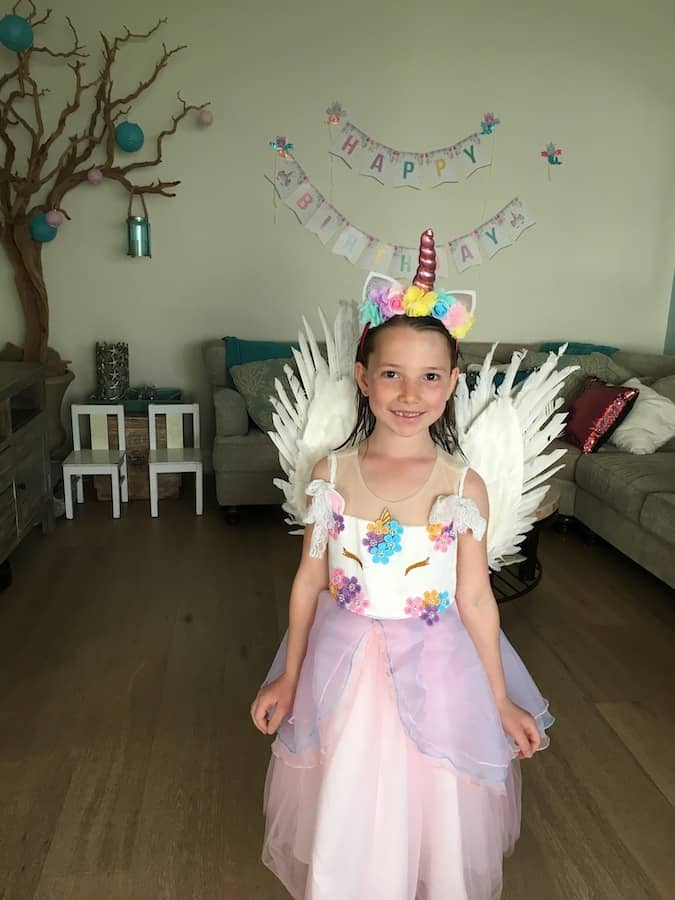
Miss E wore an adorable unicorn party dress with angel (pegasus) wings.
Uni-Pega-Mer-Kitty Birthday Party Activities
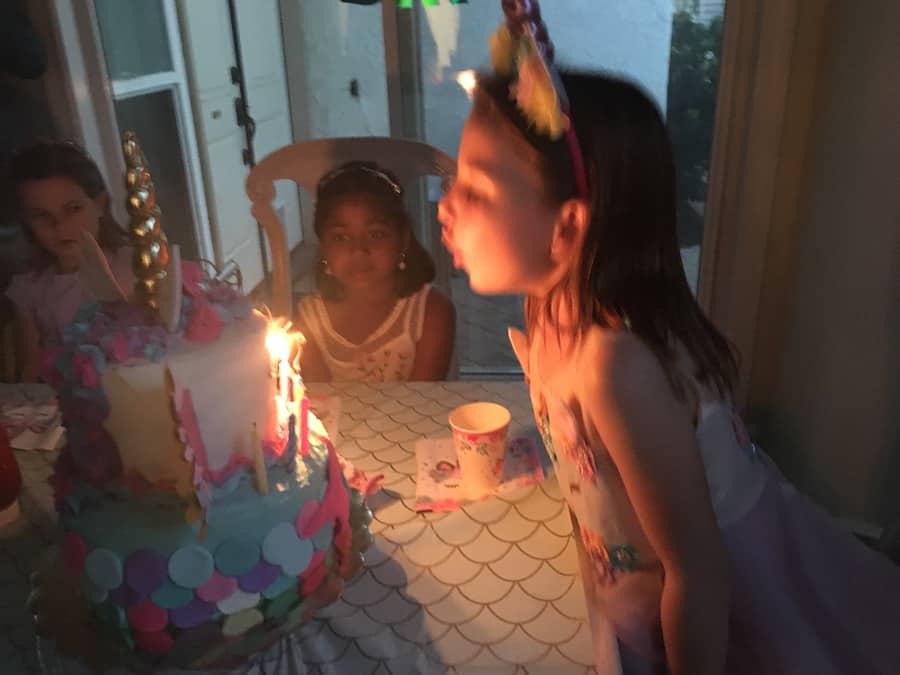
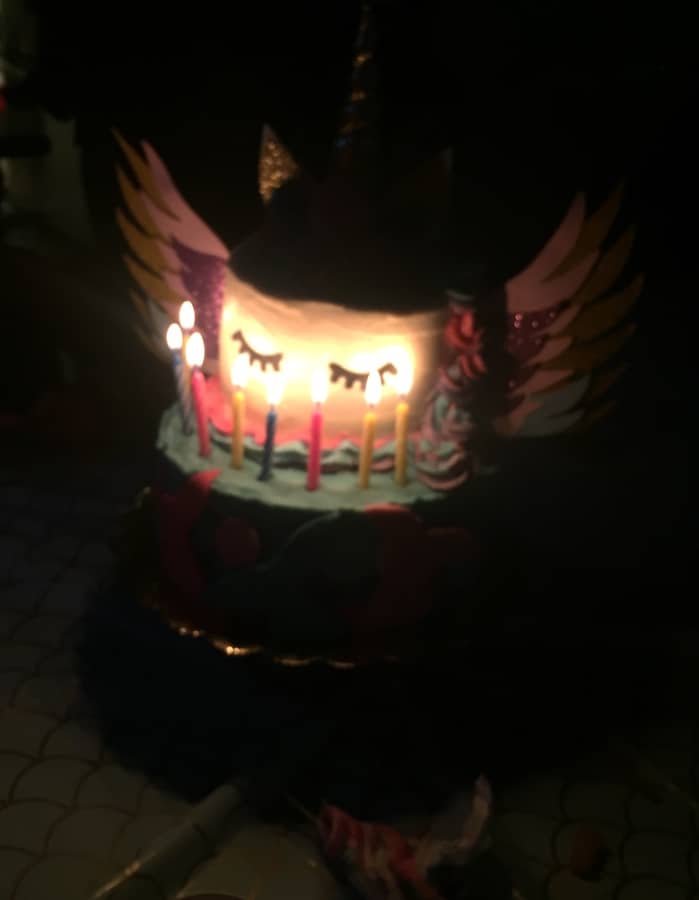
The flow of the party was very casual. We started with dinner, followed by singing "Happy birthday" and cake, with lots of playing and giggling throughout.
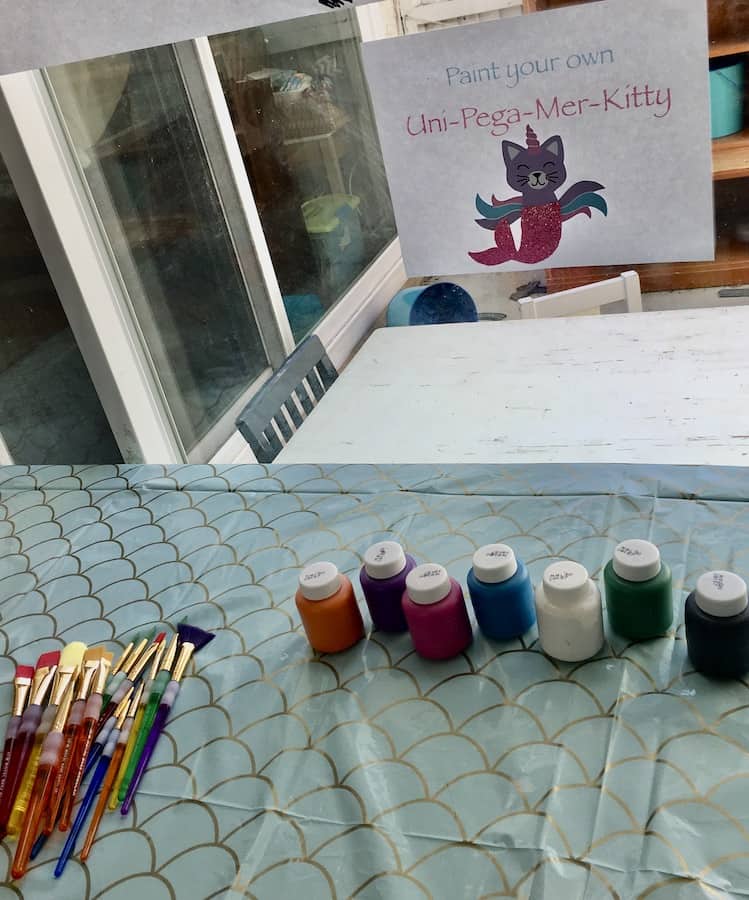
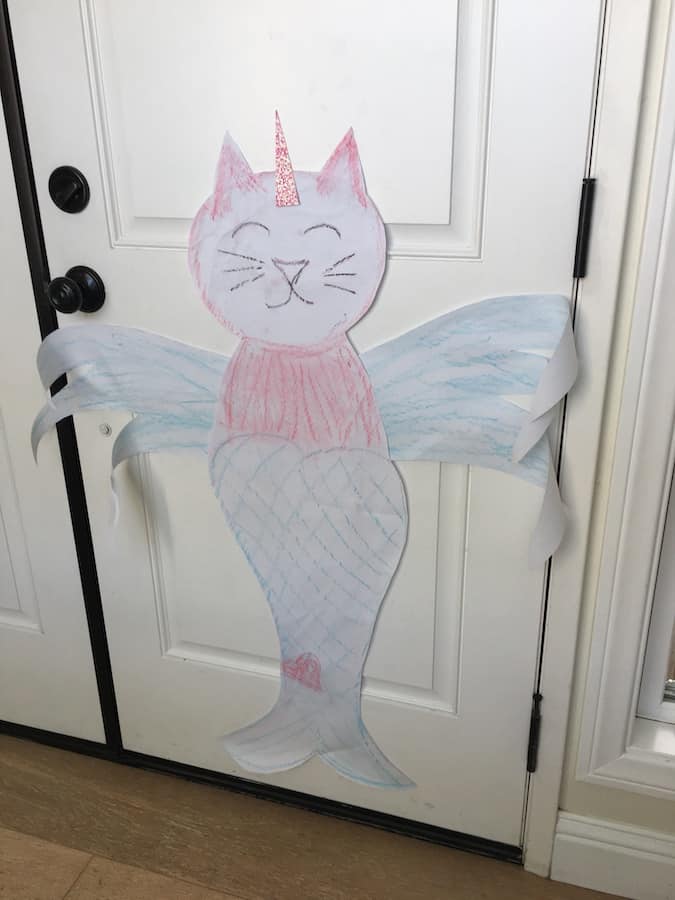
After dinner, there was time for opening presents, playing with the presents, more giggling, and a few party-themed activities. To incorporate the theme, we ordered paint and canvases, and the kids each painted their own Uni-Pega-Mer-Kitty. They also played a homemade game of pin the horn on the Uni-Pega-Mer-Kitty.
After more playing, the kids who were spending the night settled down for a movie with popcorn, served in the same unicorn popcorn boxes we bought for party favors.
It was a laid-back party with lots of Uni-Pega-Mer-Kitty fun mixed with kid-friendly, easy food.
Gluten-Free Uni-Pega-Mer-Kitty Cake 6-Day Guide
To keep the gluten-free birthday cake project from becoming overwhelming, this mammoth task is broken down for you into manageable steps by numbered days. These do not need to be consecutive days. You could easily start a few weeks early, with several days between each step. Or, if you are the cram all night type, you can do everything but the online shopping in one day!
Day 1 - Shopping! Order all of the supplies and ingredients for your gluten-free birthday cake.
While you are at it, order all of your party decorations, too!
As an inexperienced baker, I had to invest in a few new tools (pans, turntable, offset spatula, cake leveler, and fondant rolling pin); but the grand total was far less than a tiered cake from a bakery, let alone a gluten-free cake. See the Shopping Guide at the bottom of this post for links to items you may need.
Wait a few days for everything to arrive, then...
Day 2 - Bake and prep the gluten-free cake layers.
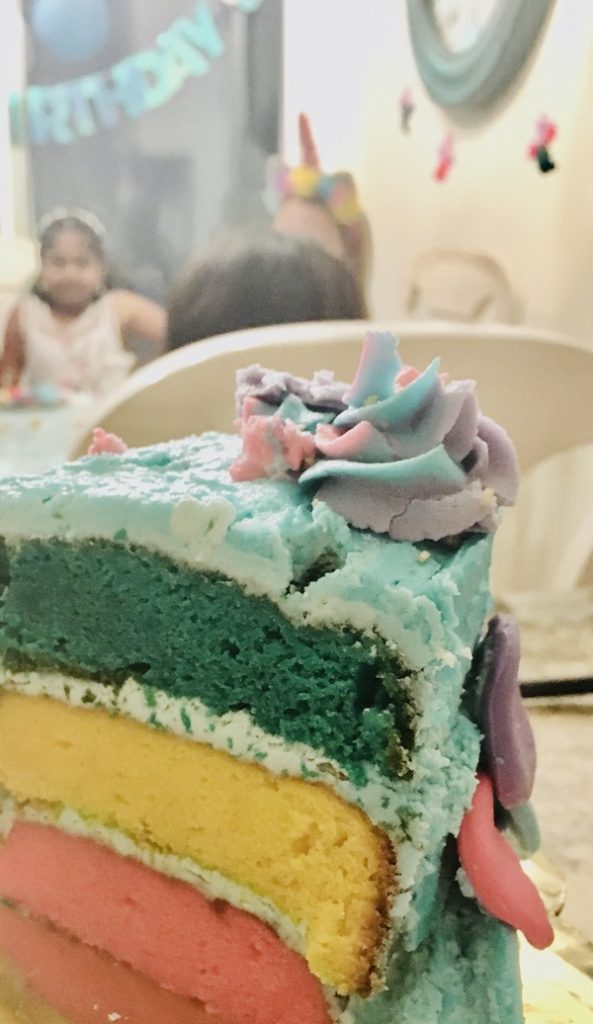
I used three boxes of King Arthur Gluten-Free Yellow Cake mix to make a two-tier cake, and each of the two tiers had three layers. The top tier was 6" and the bottom tier was 9".
Let's chat about the gel food coloring for a minute. It is optional for the cake layers, but you will need it for the fondant and buttercream frosting on Days 3 and 6. Gel-style food coloring is ideal, so you can maintain the consistency of your fondant and frosting. I had some on hand in my pantry, but if gel food coloring is not a staple in your home, you can buy Betty Crocker gel food coloring from most grocery stores (noted gluten-free on the Betty Crocker website) or Great Value gel food colors from Walmart (labeled gluten-free).
Ingredients:
- 3 boxes of gluten-free cake mix
- Staples listed on the box (x 3)
- Gluten-free gel food coloring (optional)
Instructions:
- Make the batter for the first cake mix according to the directions on the package.
- Add pink food coloring to the batter and then fill one 9" cake pan and one 6" cake pan.
- Bake according to the directions on the package, but use a toothpick to start checking the 9" cake for doneness during the last five minutes.
- Repeat the above steps for the second and third boxes, adding aqua and yellow food coloring respectively.
- Allow cakes to cool on a rack for 15-20 minutes before carefully removing them from pans.
- Once completely cooled, level the cakes with a serrated knife or leveler.
- Wrap each layer in saran wrap, place in a freezer bag, and store in the freezer for a few until Day 6. Storing the cake layers in the fridge will dry it out; but storing it in the freezer will keep it fresh and make it easier to frost later, while still in a frozen state.
Variation: In lieu of King Arthur Gluten-Free Yellow Cake Mix and food coloring, Pillsbury Gluten-Free Funfetti Cake Mix would be an even easier way to add rainbow color to this cake.
Day 3 - Make the gluten-free fondant.
What better way to make sure the fondant is gluten-free than to make it yourself?! Better still, unlike traditional fondant, this marshmallow-based, gluten-free fondant actually tastes good!
Gluten-Free Fondant Recipe
Ingredients:
- 2 - 10 oz mini marshmallows
- ¼ cup water
- 2 lb powdered sugar
- 1-2 TBS vegetable oil
- Gluten-free gel food coloring
- (also wax paper to protect your counter from the food coloring)
Instructions:
- Melt marshmallows and water in a glass bowl in the microwave, no more than thirty seconds at a time, and stir well each time.
- Use a hand mixer to mix all but 1 cup of powdered sugar into the marshmallow mixture and stir well.
- Lightly grease hands and counter with vegetable oil to prevent sticking.
- Gradually mix in the remaining cup of powdered sugar by hand and knead for about five minutes on the counter to form a large ball.
- Divide into six balls and mix the gel food colors of your choosing. I left one white and dyed the others bright pink, light pink, bright aqua, light aqua, and purple.
- Wrap each ball in plastic wrap and store it in a ziplock bag. Store in a cool place for up to two months.
Day 4 - Make gluten-free buttercream frosting.
Triple this simple buttercream frosting recipe from Betty Crocker. Lick the spatula.
Day 5 - Make gluten-free fondant decorations: mermaid scales and tails.
- Roll out one color of the fondant you made on Day 3, using a fondant rolling pin and silicone mat. Add a light dusting of powdered sugar to the mat, if the fondant is sticking.
- Cut out 14-16 circles, using a one-inch circle cookie cutter.
- Repeat for each of the five colors.
- Select three colors for mermaid tails, and form them using a mermaid fondant/chocolate mold or cut them freehand. I did the latter and gently used the edge of the straw to "draw" scales on the mermaid tails.
Day 6 - Frost, assemble and decorate your cake.
If this is your first multi-leveled masterpiece, give yourself a couple of hours to decorate the cake. You want the margin to enjoy yourself without being rushed. This is the part where all of your work comes together into a beautiful-gluten free birthday cake for your Uni-Pega-Mer-whatever party.
I recommend decorating the cake the morning of the party, if possible. The texture of the gluten-free cake will be at its best. If the day of is not possible, you can decorate your cake the night before and leave it on the counter in a cool room.
Frost and assemble your gluten-free birthday cake:
- Starting with the 6" layers, take them out of the freezer, and assemble the three layers on the 6" cake board on the locked cake turntable, using a thin layer of white buttercream frosting between each layer.
- Apply a crumb coat of buttercream frosting to the 6" cake and let it set at room temperature for 20 minutes until the frost has formed a crust.
- Frost the 6" cake with your buttercream frosting, using a turntable and an offset spatula. Half of this cake will be covered with a mane, so don't stress about it being perfect.
- Take half of the remaining frosting and dye it aqua. Set the rest of the frosting aside to use later for accents, the unicorn-pegasus mane, and the base of the top layer
- Repeat steps 1-3 with the 9" layers and aqua frosting. Again, your frosting does not have to be perfect, as much of the bottom layer is covered with another cake on top, and mermaid scales cover most of the sides. Relax and have fun! Place the remaining aqua frosting in a frosting bag to be used later when you "decorate your gluten-free birthday cake" below
- Follow the directions on the package of Wilton's tiered cake support rods and caps to put your two cakes together. Remember, I had never done this before. You can do this!
Decorate your gluten-free birthday cake:
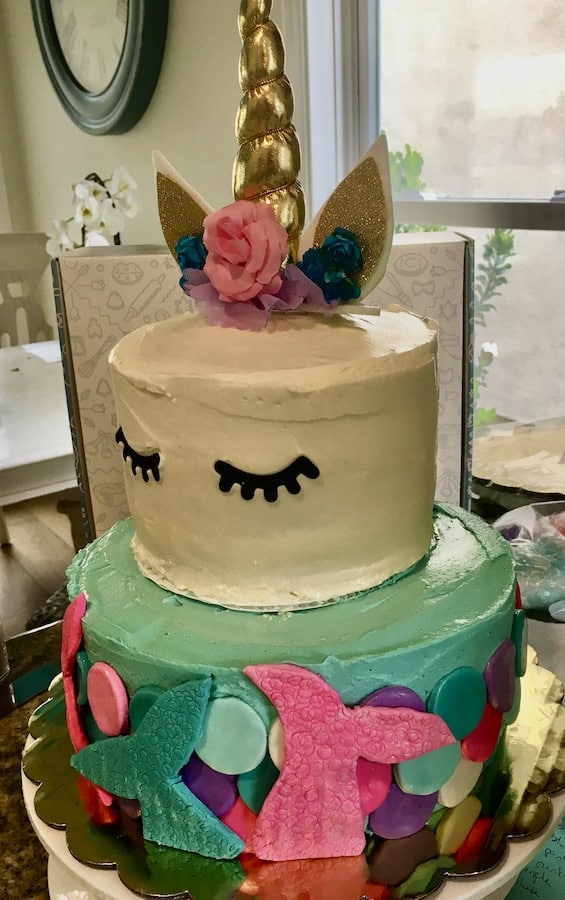
- Make a straight row of fondant circles (mermaid scales) along the bottom of the aqua cake, placing the colors randomly and allowing about 1 mm or less between each circle.
- Make a second row of circles, overlapping with the first row. Staggering the circles in the second row evenly between the circles in the first row, so the aqua frosting is not showing.
- Repeat step 2 for the third row of mermaid scales.
- Add three fondant mermaid tails to the front of the aqua cake, on top of the mermaid scales.
- Divide your remaining white buttercream frosting into two separate bowls, and mix in a small amount of pink and purple gel food coloring to dye each bowl of frosting respectively, until you get a bright color. After adding the food coloring gel, you may need to add a small amount of powdered sugar to re-thicken the frosting a bit. This will allow your Uni-Pega-Mer-Kitty's mane to better hold its shape if the gel food coloring thinned the frosting.
- Place each of the buttercream frosting colors (pink and purple) in its own frosting bag.
- Use a three-color piping bag coupler to attach the three bags of buttercream frosting (remaining aqua that you set aside after frosting your cake, and pink and purple from step 6) with a large star tip.
- Pipe a three-color trim around the white cake to hide the 6" cake board.
- Add the purchased decorations. First, trim unicorn ears to appear more cat-like, then place the unicorn horn with ears and fabric flowers, eyelashes, and pegasus wings in the white cake.
- Make a couple of practice swirls, and then pipe three large swirls in front of the unicorn horn. Continue piping swirls behind the horn, covering the back of the white cake behind the pegasus wings, and add some swirls coming around and down in front of the pegasus wings on one side.
Take pictures of your beautiful cake, post them on social media, and tag @GoGlutenFreely! You did it!
Want more ideas for gluten-free celebrating and living? Sign up below for the Go Gluten Freely newsletter!


Leave a Reply