This recipe is such an easy meal. With just two ingredients and 30 minutes, you can enjoy a fabulous dinner tonight!
This delicious recipe requires no meal prep. It makes tender and crispy chicken thighs with all of the wonderful flavor of cooking over a hot grill.
Some of the links on this post are affiliate links. To learn more, visit our Disclosures.
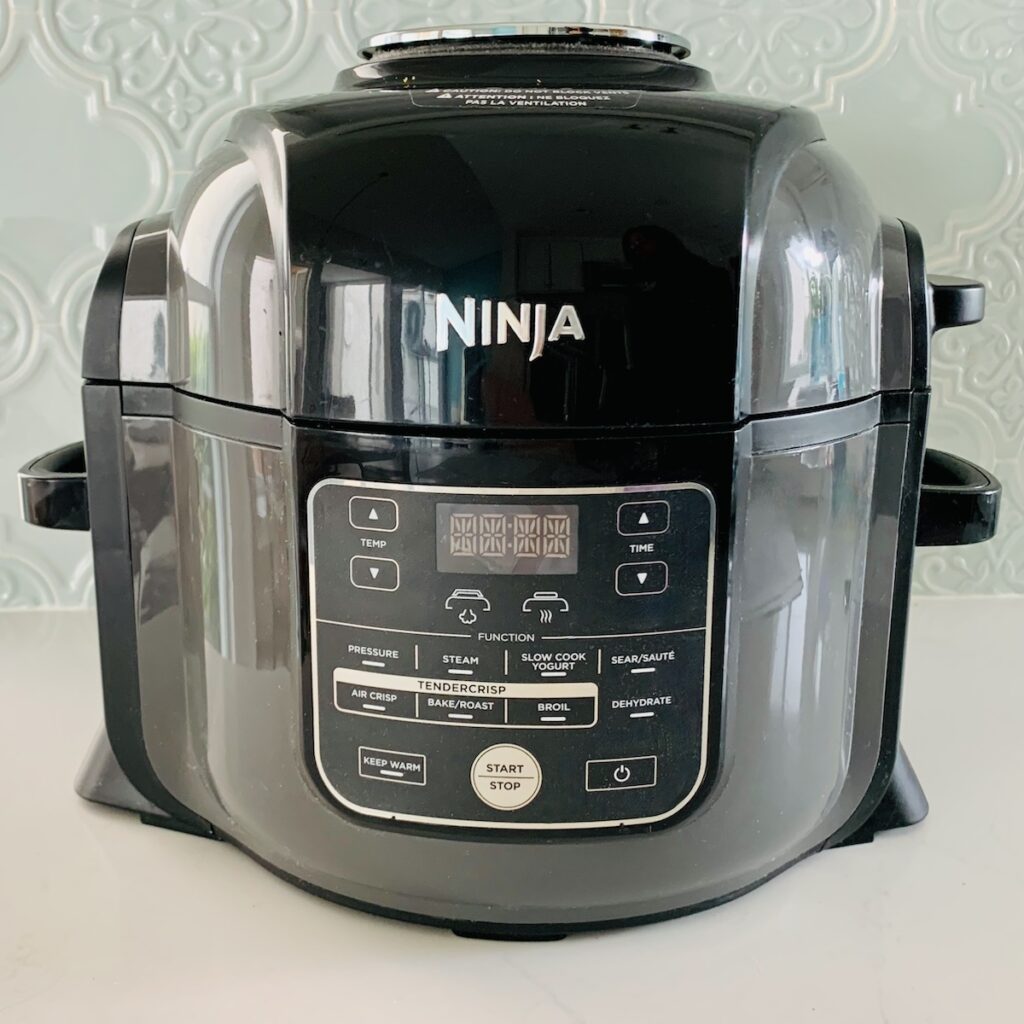
I make this simple recipe in the Ninja Foodi air fryer, which I love because it:
- is easy to use
- heats up quickly
- cleans easily in the dishwasher
- combines pressure cooking with air frying (we're only using the air fryer in this recipe)
That last feature is what makes the Ninja Foodi so exceptional. You get the speed and rich, cooking-all-day flavor of a pressure cooker. Then, you can finish it with a quick crisp, just by switching from the pressure cooking lid to the air fryer lid.
Don't worry! You don't actually need a Ninja Foodi to make these BBQ chicken thighs. Because this particular recipe does not use Ninja Foodi's pressure cooker features, it works just as well in any air fryer.
You may need to adjust the cooking time slightly based on your air fryer's variability. Whatever air fryer you use, you're still going to check for doneness with a meat thermometer.
Equipment
The first three pieces of equipment are essential to making these Air Fryer Chicken Thighs. You can work around the last three, but they do make adding the barbecue sauce very easy.
Air Fryer
This is the magical machine that gives you crispy food without added fat. Any air fryer will do the trick.
If you are making this recipe with the Ninja Foodi, you'll use the attached crisping lid and the cook & crisp basket (both included with your Ninja Foodi at the time of purchase).
Meat Thermometer
Digital meat thermometers are popular, but I'm a fan of the old-fashioned kind. I never have to worry about it running out of batteries right when I need it.
Whichever style you prefer, you need a meat thermometer. It is important for food safety and is the only reliable way to verify that the inside of your chicken has been fully cooked.
Tongs
Any tongs will work, buffet tongs, barbecue tons, or salad tongs. You just need to be able to easily grab the chicken and flip it.
Basting Brush
This last tool is not required but is helpful for quickly and easily coating the chicken thighs with barbecue sauce.
Measuring Cup
The recipe calls for ¼ cup of barbecue sauce. You can use a measuring cup or just eyeball it and add barbecue sauce to your personal taste.
Small Bowl
To keep your air fryer from becoming a big mess of dripping sauce, pour the barbecue sauce into a small bowl (or even a cup) and baste the sauce from the bowl onto the chicken.
Ingredients
3-4 Chicken Thighs
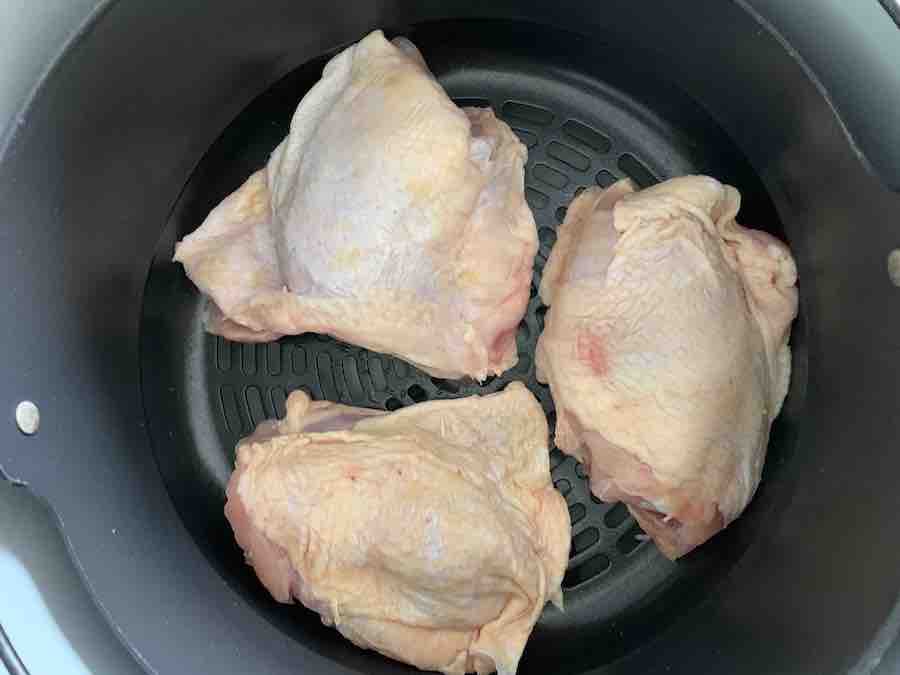
Depending on the size of your chicken thighs, you can fit 3-4 chicken thighs in the air fryer with enough space for air to circulate.
Barbecue Sauce
Make this recipe with your favorite barbecue sauce. Choosing a flavorful sauce is key to the simplicity of the recipe. You don't need to spend extra time with a rub or adding salt or seasonings. The air fryer cooks the chicken perfectly and the sauce brings it home with all of the flavor.
As always, everything on Go Gluten Freely is gluten-free and safe for you if you have celiac disease (like me) or gluten sensitivity.
This recipe is easily gluten-free. You just have to make sure you choose a gluten-free barbecue sauce, as many brands contain wheat as a thickener, soy sauce (which contains wheat), or beer (which contains barley).
Happily, you won't be sacrificing any flavor to make this air fryer chicken recipe with one of the many gluten-free barbecue sauces on the market.
Here few easy-to-find brands of gluten-free barbecue sauce:
Stubb's Bar-B-Q Sauces
Stubb's extensive line of barbecue sauces is certified gluten-free.
Certified means a third party verifies the product has below 10 parts per million gluten, beating the FDA standard of below 20 parts per million. Always check the label at the time of purchase for the latest, most accurate, assurance that the product you are buying is gluten-free.
Stubb's has so many flavor options from Hickory Bourbon to Jalapeno & Honey. Every flavor I have tried is delicious.
Most recently, I used Stubb's Simply Sweet Reduced Sugar Bar-B-Q Sauce, and it was plenty sweet. Even with my sweet tooth, I actually prefer low (or even no) sugar sauces, so the other flavors can shine.

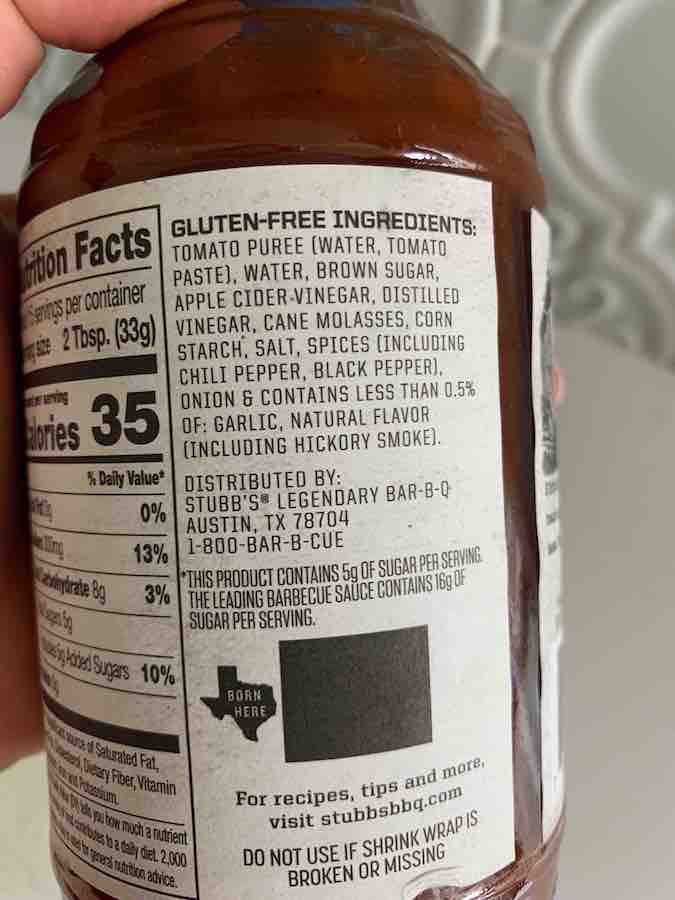
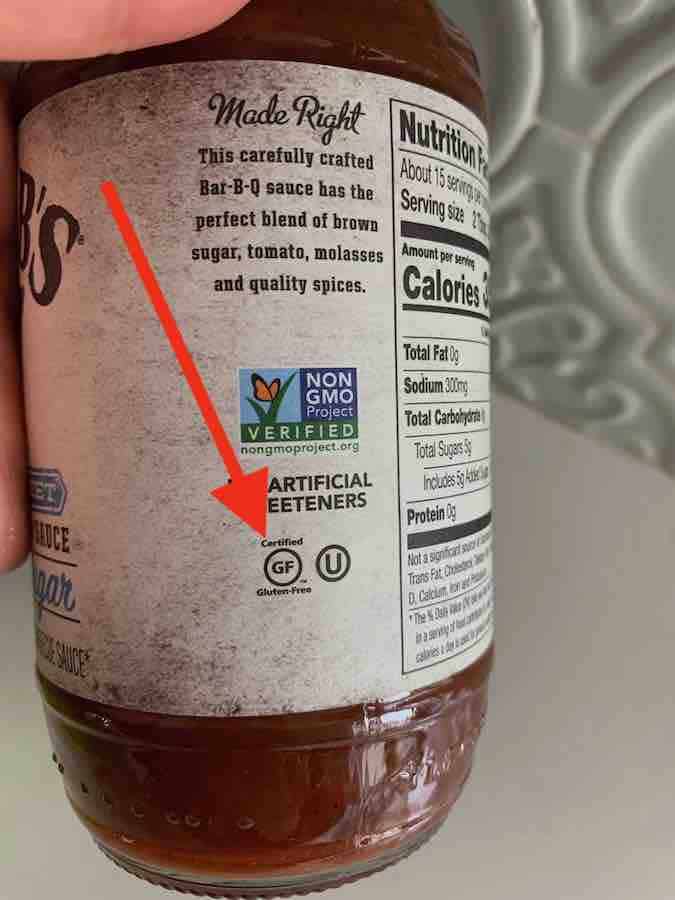
My kids devoured the chicken thighs with Stubb's Simply Sweet Reduced Sugar BBQ Sauce... even my child who frequently greets me at the dinner table with, "Chicken, again?"
Stubb's is also easy to find, saving you from running from store to store in search of gluten-free ingredients. You can buy Stubb's Bar-B-Q Sauces at big box stores (Target, Walmart), major grocery stores, and Amazon. In general, though, Amazon is more expensive than in-store options.
If affordable, easy to find, and great taste are your priorities, Stubb's is a clear winner.
Noble Made

Noble Made barbecue sauce is certified gluten-free and is also guilt-free. Targeting the Keto-crowd, this brand perfectly checks the box for a gluten-free diet while being made with recognizable ingredients, none of which are sugar.
Check out the ingredients on the Noble Made Smoky BBQ Sauce: Tomato Puree (Water, Tomato Paste), Apple Cider Vinegar, Apple Juice Concentrate, Salt, Paprika, Onion Powder, Chili Powder, Black Pepper, Natural Mesquite Smoke Flavor, Garlic Powder, Tamarind Concentrate, Cayenne Pepper, Allspice, Cloves. Just real ingredients.
For a flavor twist, try the Noble Made Mustard BBQ Sauce in this recipe.
As you might imagine, Noble Made sauces are on the healthier but pricier end of the spectrum. For 15% off your order of Nobel Made products, use the discount code: GOGLUTENFREELY at checkout.
Noble Made sauces are also available at Walmart, Thrive Market, Amazon, and many major grocery stores.
I'm a huge fan of this brand, if it's in your budget. If not, Stubb's or one of the other brands below are more affordable and excellent options.
More Gluten-free Barbecue Sauce Brands:
Look for "gluten-free" noted on the label every time you buy, to confirm that the sauce is still gluten-free.
Step-By-Step Instructions
Select "Air Crisp", set the temperature to 400℉, and set the timer to 33 minutes.
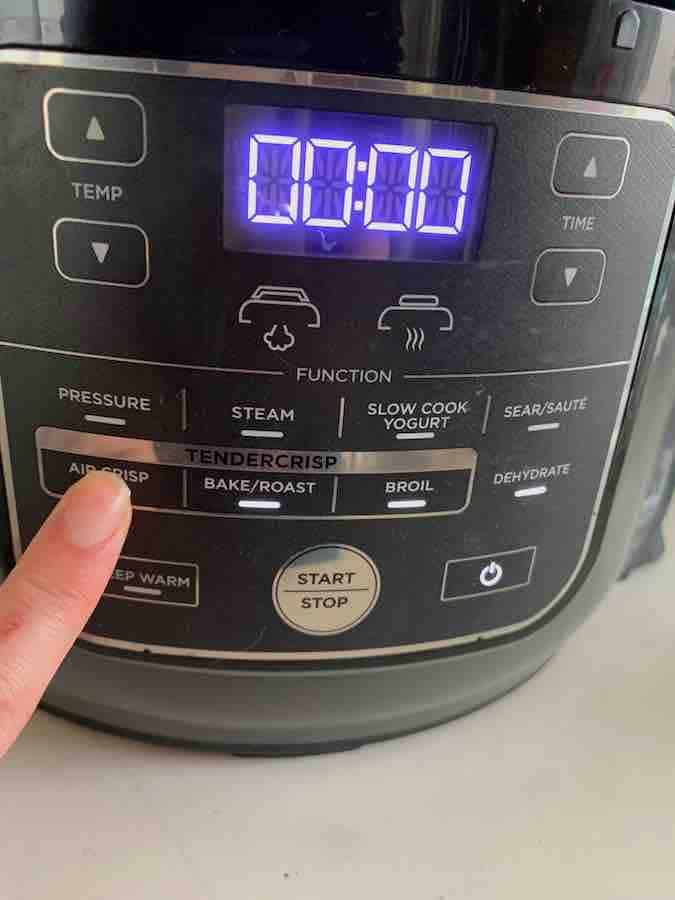
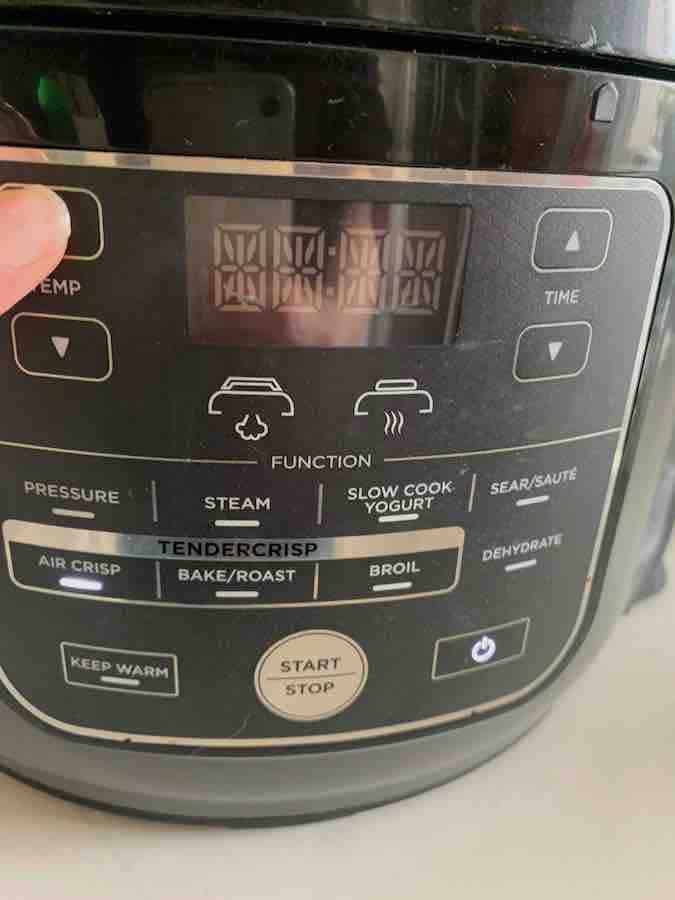
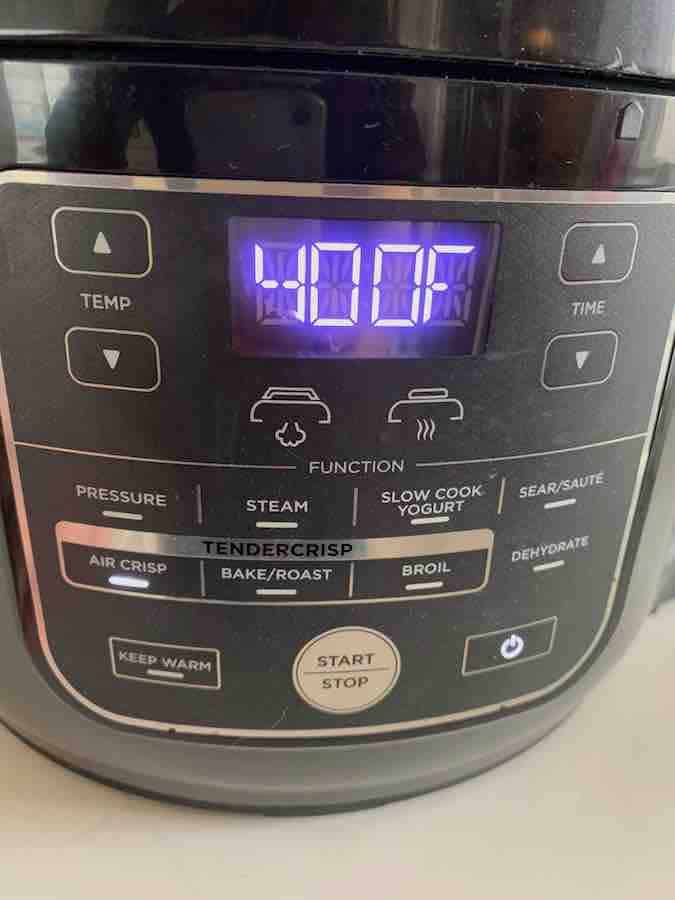
400℉ is the ideal temperature to fully cook the chicken and keep it tender while crisping the chicken skin.
I prefer to set the air fryer timer to 33 minutes, to include the full preheat time and maximum cooking time. Then, I use a kitchen timer (Alexa, in my case) to set timers for each of the steps, like flipping the chicken.
Select 3-4 pieces of bone-in, skin-on chicken thighs. Pat dry.
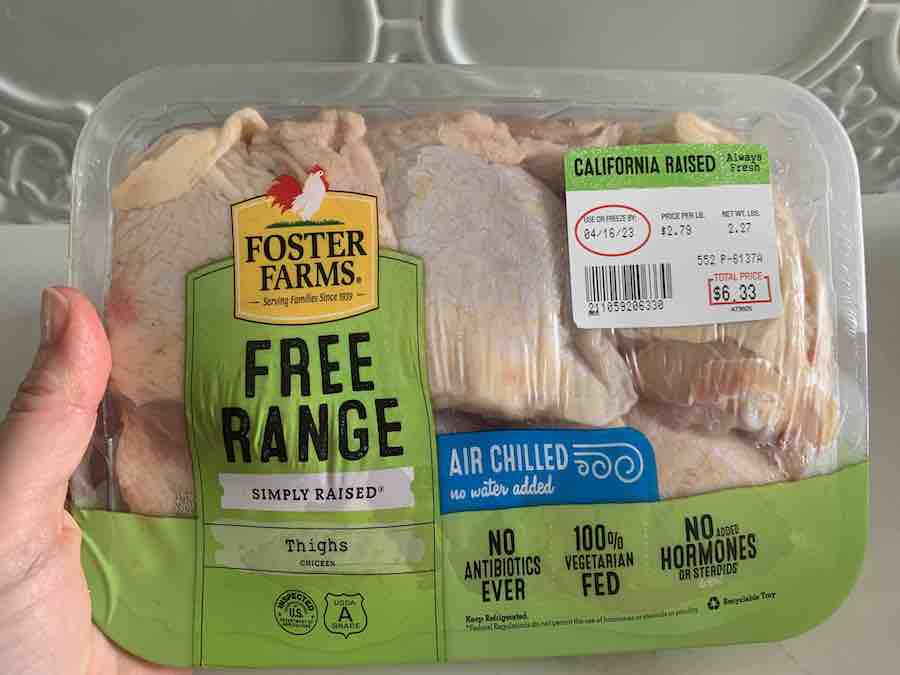
While patting dry step isn't absolutely essential, it gets rid of extra moisture on the chicken skin, allowing your air fryer to get straight to the business of making perfectly crispy skin.
Place chicken thighs in the air fryer basket skin-down. Make sure the chicken is in a single layer and leave enough space between each thigh so the air can circulate.
You're going to rotate the chicken to skin up about halfway through the cooking time. Placing it skin-down first, allows you to flip it while the skin is still soft enough to keep it from sticking to your air fryer basket. You'll end up with prettier chicken and easier cleanup.
There's no need to rub olive oil on the chicken. There is enough fat in the skin to make perfectly crispy chicken.
Also, no need for spices or rubs. You'll get optimal flavor from your barbecue sauce as it caramelizes in the air fryer.
Air circulation is critical for air frying. It is the air that does the "frying" after all. To get wonderfully crispy skin, place the chicken in a single layer on the bottom of the air fryer basket and make sure there is enough space around each chicken thigh for air to freely circulate.
Depending on the size of your chicken thighs, you should be able to fit about 3 or 4 pieces of chicken. If you need more, you can prepare this recipe in batches.
On this particular night, I was only cooking for three people, so I spaced out three larger thighs and used the two other thighs in the package to make a different recipe for quick lunches. Four small. to medium chicken thighs also fit well in this air fryer.
Think of it as a game of Tetris!
After 10 minutes, flip the chicken, skin-side-up. Close the lid, and air frying will continue.
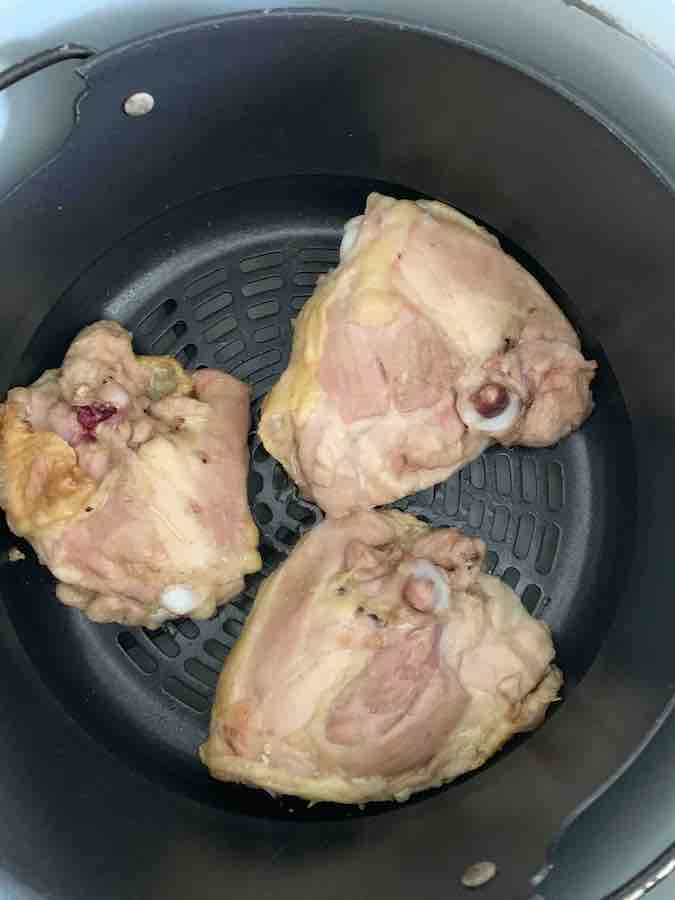
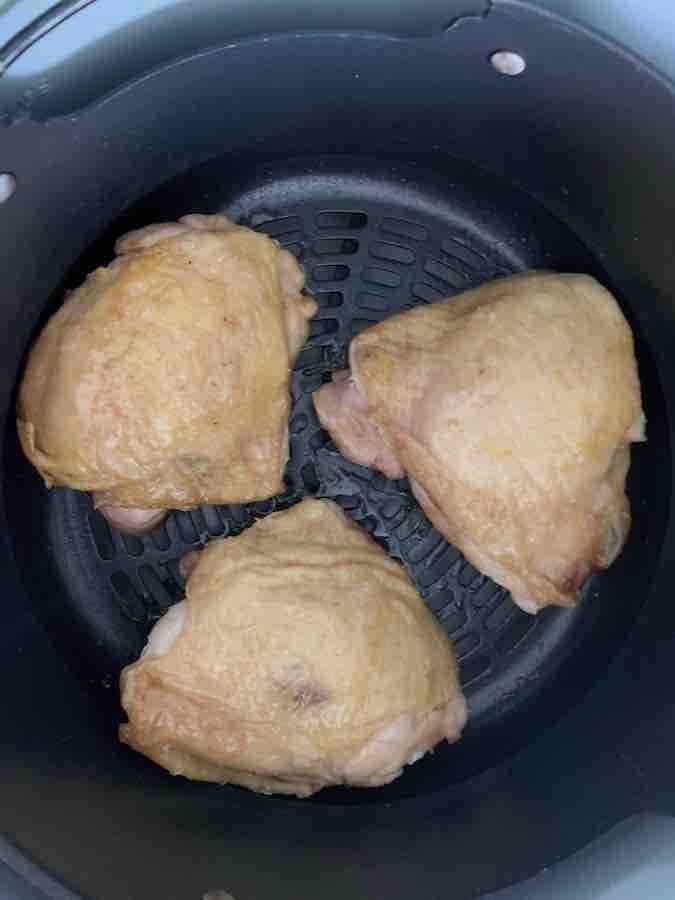
Flipping the chicken allows for the chicken to be cooked evenly all around. Even though the air fryer basket has holes for air circulation, you'll get the best results when you rotate the chicken pieces.
Make sure that there is still space for air to circulate around each chicken piece.
After another 8 minutes (18 total), liberally brush barbecue sauce on both sides of the chicken, and set chicken thighs back in the basket skin-side-up.
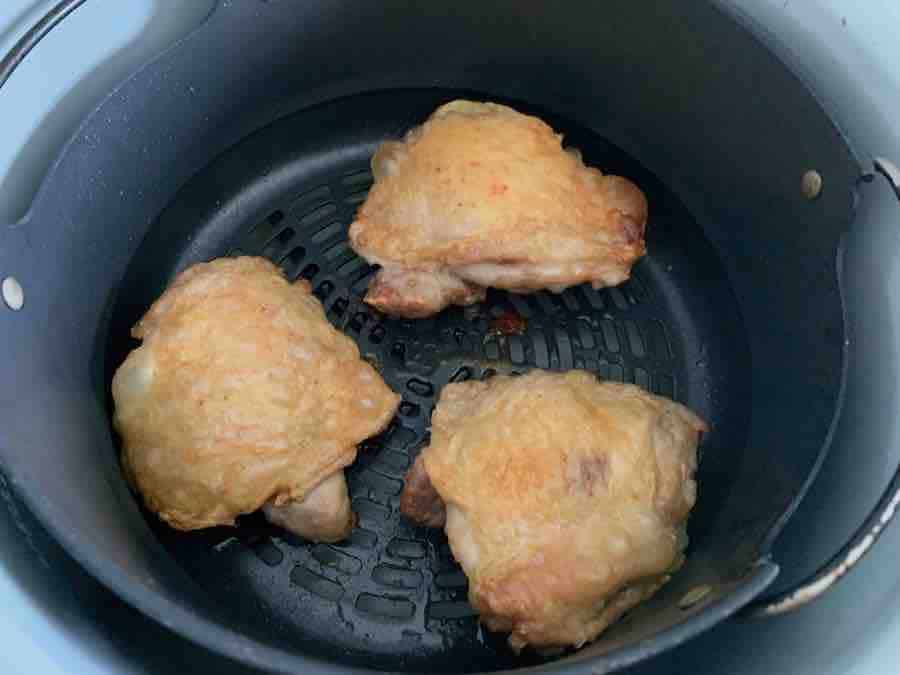
After 18 minutes, the chicken skin will be beautifully golden brown and crispy. It's time to add the barbecue sauce. Rotate the chicken with regular tongs, or even salad tongs, to baste the bottom of the chicken thighs first.
Return them to the basket, again, with space between each thigh. Then generously brush barbecue sauce along the top and sides of each piece.
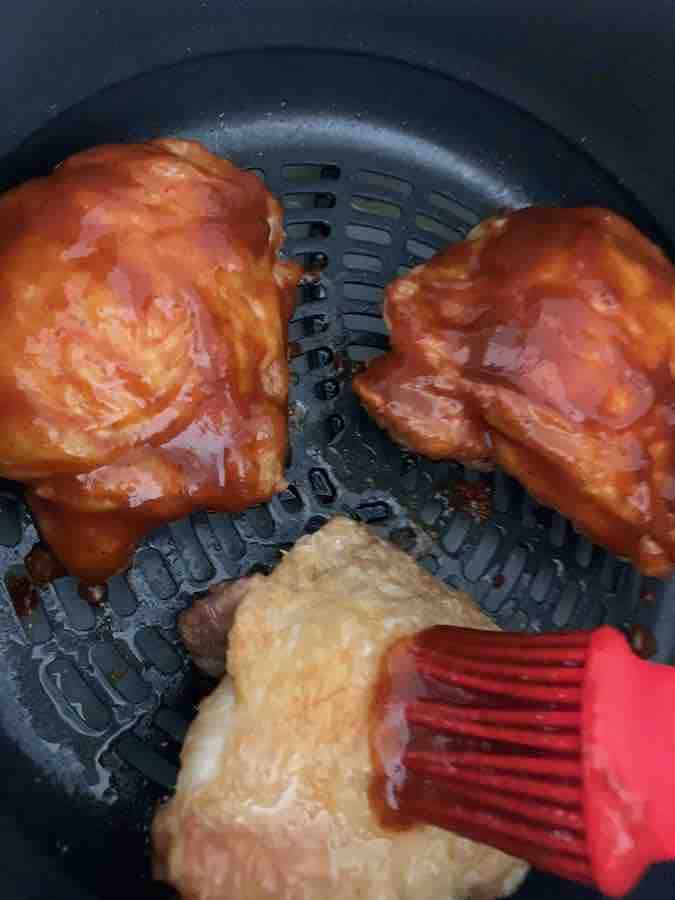
Cook chicken thighs with barbecue sauce for a final 7-10 minutes. Use a meat thermometer to check the chicken for doneness. The thickest part of the thigh should have an internal temperature of 165℉.
With the air fryer at 400℉, the sauce will caramelize in about 7-10 minutes, as if you had cooked it on the grill.
After you add the barbecue sauce, you'll still have ten minutes left on the Ninja Foodi timer. It may not take the entire remaining ten minutes to fully cook the chicken.
You can check for doneness a few minutes early or use the remaining five minutes to allow the barbecue sauce to blacken a bit.
Important for food safety! Do not skip this step. Continue cooking chicken until the internal temperature reaches 165℉. Use a meat thermometer to check the chicken for doneness.
Allow chicken to rest for five minutes before serving. Enjoy!
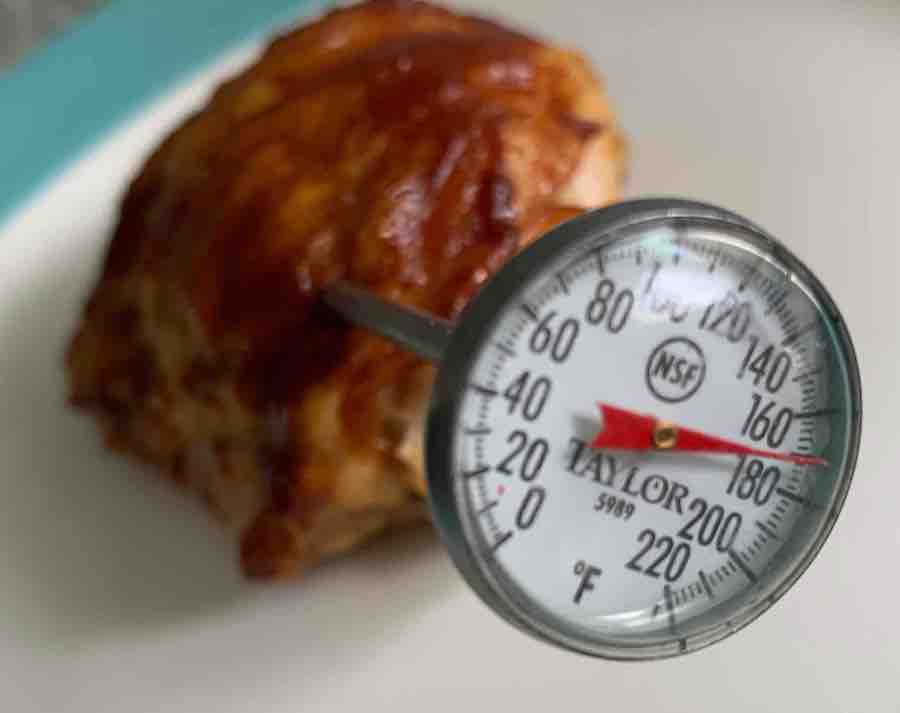
The internal temperature of the chicken will continue to rise by about 5-10 degrees while the chicken rests, and then it will start to cool a bit.
Allowing the chicken to rest, gives time for the juices to redistribute throughout the meat, giving you a juicy, tender piece of meat.
You've done everything right so far: air fryer for crispy chicken, caramelized barbecue sauce, and now just five minutes of patience will give you the absolute best chicken thighs.
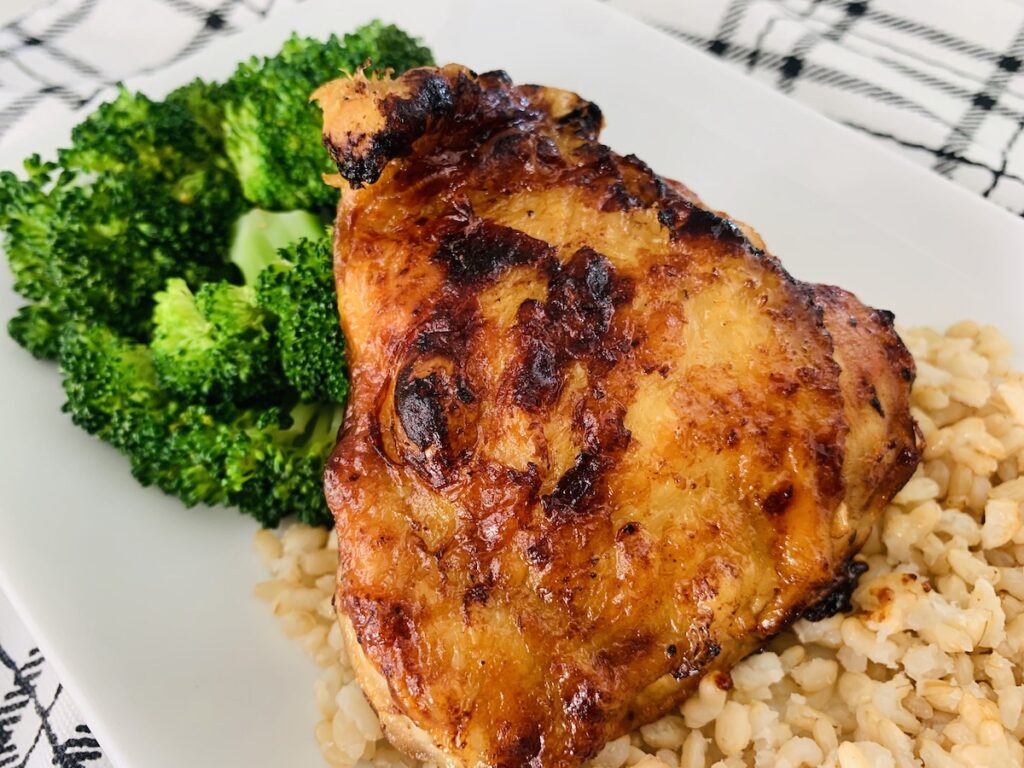
Once you've waited five minutes, serve your BBQ crispy Ninja Foodi chicken thighs with your favorite sides. Try traditional green beans and mashed potatoes in winter or potato salad and a refreshing Mediterranean Cucumber Salad (with Greek Yogurt & Honey Dressing) in summer.
Leftovers
Store leftover chicken thighs in an airtight container in the fridge, and eat within 3-4 days, per USDA recommendations.
Reheat, and most importantly re-crisp, the chicken thighs in the air fryer at 375℉ for approximately 4-6 minutes, flipping halfway for even cooking. Just like when you made this chicken the first time, make sure it reaches an internal temperature of 165℉ when reheating.
If your family is like mine, you can add this air fryer chicken thighs recipe to your go-to list for busy weeknight meals!

Air Fryer BBQ Chicken Thighs
Equipment
- Air Fryer If using Ninja Foodi, use the Cook & Crisp Basket & attached Crisping Lid
- Meat Thermometer
- Tongs
- Basting Brush
- Measuring Cup (¼ cup)
- Small Bowl
Ingredients
- 3-4 bone-in chicken thighs (skin on)
- ¼ cup barbecue sauce (plus extra, if you want to add a generous coating after the chicken is cooked)
Instructions
- Preheat the air fryer to 400℉.
- Pat 3-4 (bone-in, skin-on) chicken thighs dry. Place chicken skin-down in the crisping basket with space between each thigh so the the air can circulate allowing each thigh to crisp.
- After 10 minutes, flip the chicken skin-side-up. Close lid and air frying will continue.
- After another 8 minutes (18 total), liberally brush barbecue sauce on both sides of the chicken, and set chicken thighs back in the basket skin-side-up.
- Cook chicken thighs with barbecue sauce for a final 7-10 minutes. Use a meat thermometer to check chicken for doneness (thickest part of chicken should have an internal temperature of 165℉).
- Option: Add extra barbecue sauce to taste.
- Allow chicken to rest for five minutes before serving. Enjoy!


