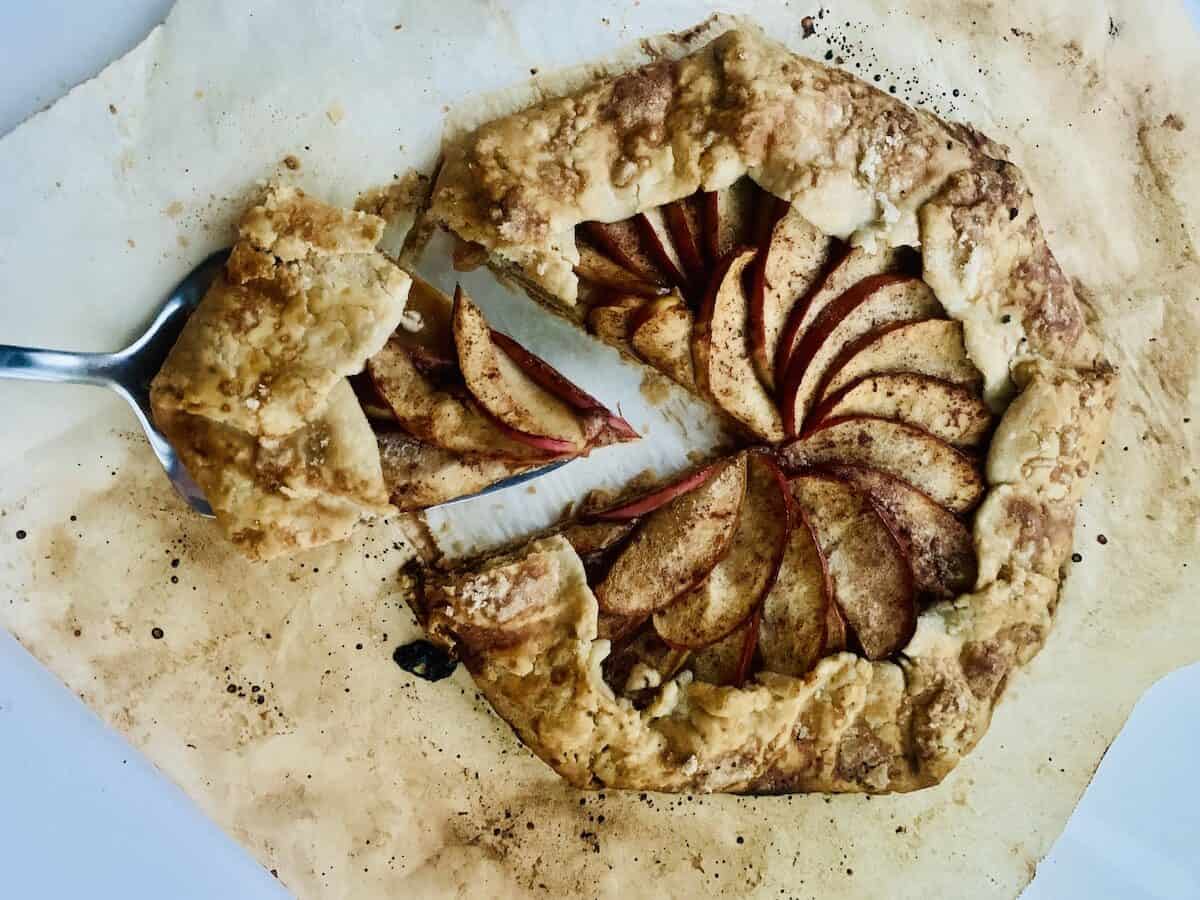
A rustic gluten-free apple galette is the perfect gluten-free fall dessert recipe. Deceptively impressive, yet simple. A delicious, flaky, and buttery gluten-free pie crust, packed with the flavors and colors of autumn.
This easy recipe requires no top crust, no pie plate, and no fuss! Instead, this beautiful French tart needs only a simple baking sheet and parchment paper.
Jump to:
Why You'll Love This
- Delicious: Packed with the nostalgic flavor of apple pie.
- Charmingly rustic: A classic French dessert with timeless, artisanal charm.
- Fuss-free: So little work, so much reward. This easy dessert is designed for beginners. The beauty is in the imperfections. You really can't mess it up!
Summarize & Save This Content On....
Ingredients

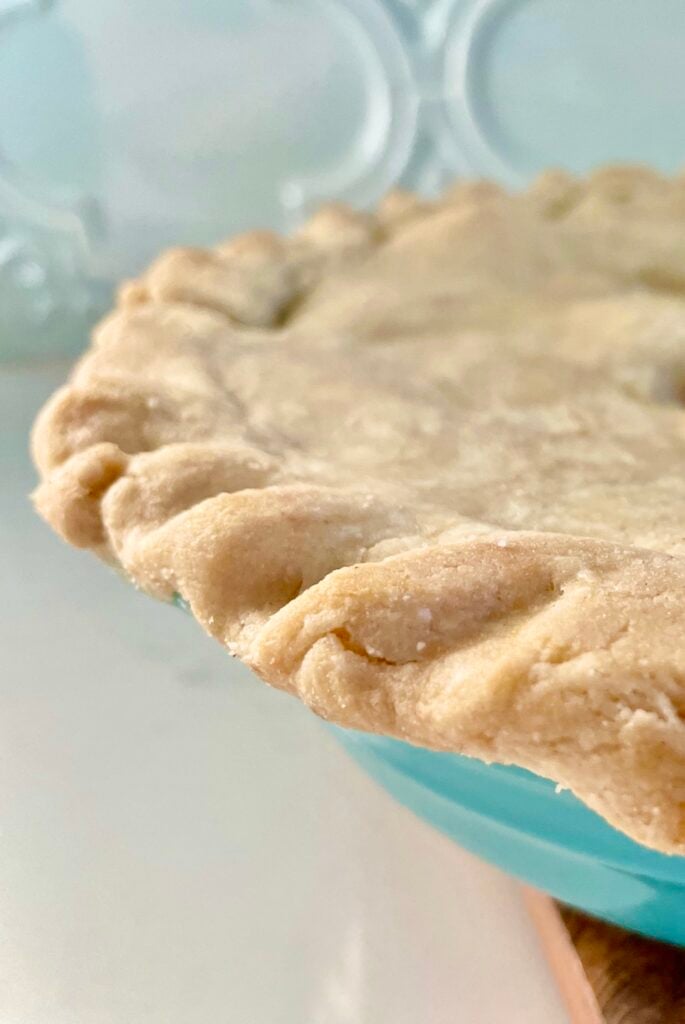
- Gluten-Free Pie Crust: Try my easy recipe for homemade gluten-free pie crust. Or use a mix like Bob's Red Mill Gluten-Free Pie Crust Mix, or purchase a pre-made crust, like Sweet Loren's Gluten-Free Pie Crust.
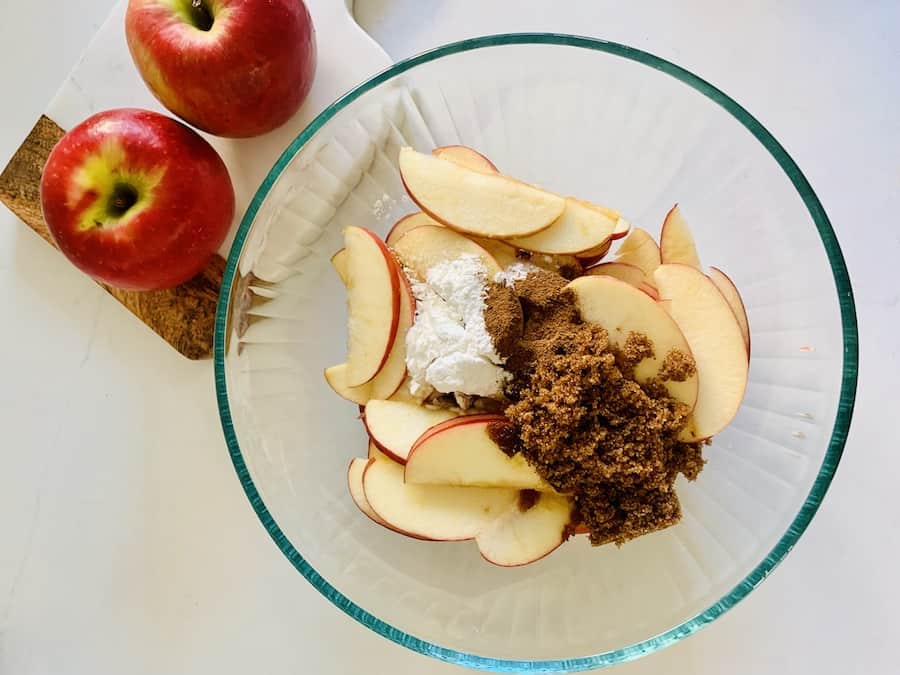
- Sliced Apples & Lemon Juice: Lemon juice enhances the tartness of the apples. I recommend using Pink Lady or Honeycrisp apples, which are a perfect blend of sweet and tart, and hold up well to baking due to their firmness. Whichever apple variety you choose, wash, core, and thinly slice your fresh apples to ⅛-¼-inch thick. Leave the apple peel on for more nutrients and to add another touch of fall color to this otherwise golden-brown dessert.
- Cinnamon & Dark Brown Sugar: Pair together to add fall flavor and a natural, rustic visual appeal. Feel free to substitute light brown sugar if that's what you have.
- Butter & Cornstarch: The butter works with the cornstarch as a thickener, while adding richness. Use salted butter to balance the sugar and enhance the flavor.
- Water, Egg & Sugar: for an optional egg wash.
See recipe card for quantities.
Make your own crust!
Gluten-Free Pie Crust
5 ingredients and 10 minutes, plus one hour of chill time!
Makes 2 crusts! Save the extra crust for a savory recipe, like Gluten-Free Chicken Pot Pie or Gluten-Free Turkey Pot Pie.
Step-By-Step Instructions

Step 1: Roll Out Pie Crust
Preheat oven to 400℉.
Place your chilled pie dough on a piece of parchment paper.
Dust your rolling pin and work surface with a small amount of gluten-free flour to prevent sticking, as needed.
Roll out the pie crust dough to approximately 12" round. If the crust breaks, simply press it together with your fingers. The edges can be rough and uneven; that's the beauty of making a rustic galette.
Return the dough (still on parchment paper) to the refrigerator while preparing the filling.
Step 2: Combine Filling Ingredients
Place the unpeeled, sliced apples in a large mixing bowl. Add brown sugar, lemon juice, cornstarch, and cinnamon. Then, toss until the apples are fully coated.

Step 3: Arrange Apple Slices
Place the chilled pie crust and parchment paper in the center of a large baking sheet. For now, it's okay if your parchment paper and crust are hanging off the edge of the baking sheet.
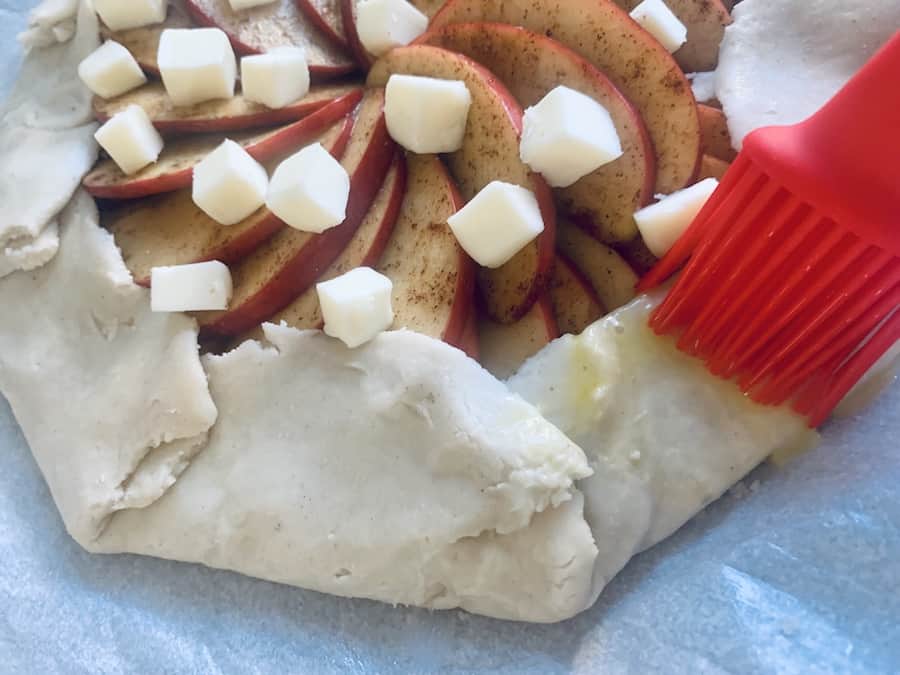
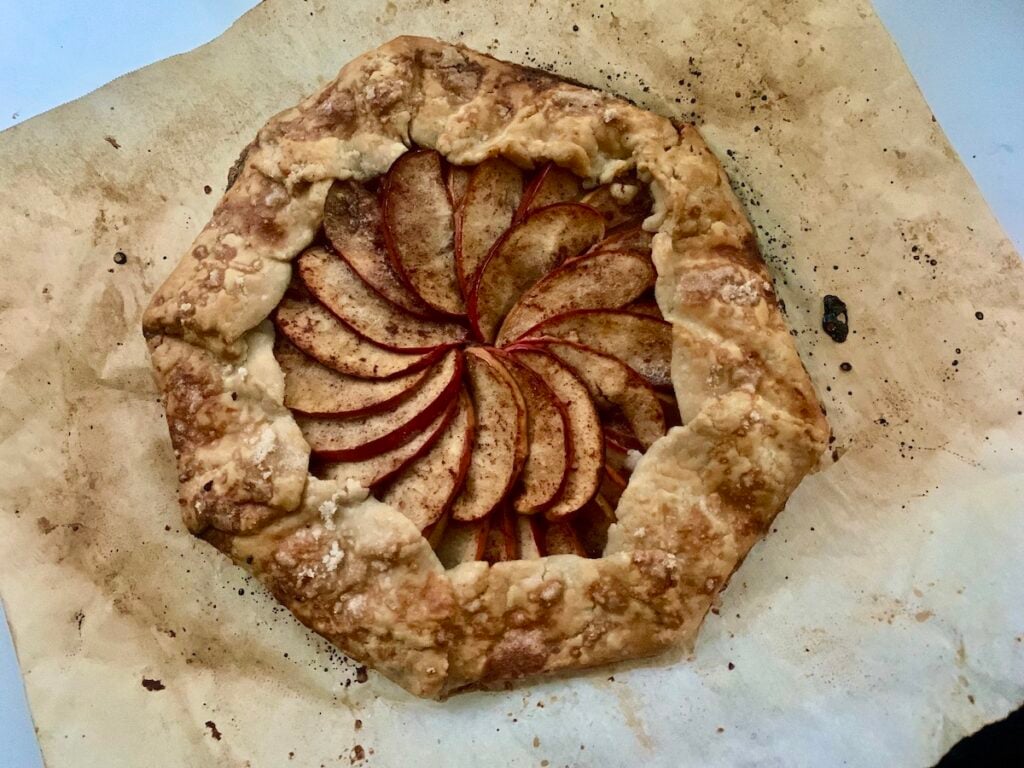
Arrange overlapping apple slices on top of the dough in two circles.
Start with the outer circle, leaving an approximately 2-inch edge of dough all the way around. Later, you'll fold the extra dough over the filling, forming the top edge of the crust.
After you've completed the outer circle, fill in the center of the galette with a smaller circle of apples. The finished apple layers remind me of a dahlia blossom.

Step 4: Fold the Crust
Keeping the pie dough on the parchment paper, fold the edges of the dough and parchment paper towards the center, bringing in just one small segment (approximately 3") at a time. As you fold in each segment, gently peel back the parchment paper. The dough will naturally pleat as you go.
Dot the apple filling with the butter cubes.
Step 5: Finishing Touches
Make a simple egg wash to give the crust its beautiful golden brown finish. In a small bowl, beat the egg and water with a fork. Then, use a pastry brush to coat the visible crust edge with the egg wash.
Sprinkle sugar along the crust's edge.
Trim any parchment paper that is still hanging over the edge of your baking sheet.
Chill the prepared galette in the refrigerator for 10 minutes before baking. This quick step allows the butter in the dough to get cold again, giving you a flakier crust in the finished galette.
Step 6: Bake
Place the galette in the bottom third of the preheated oven. Bake at 400℉ for approximately 40-45 minutes.
The apple galette is ready when the apples are tender and the crust is golden brown.
Carefully transfer the galette to a wire rack and let it cool for 10 minutes before slicing.
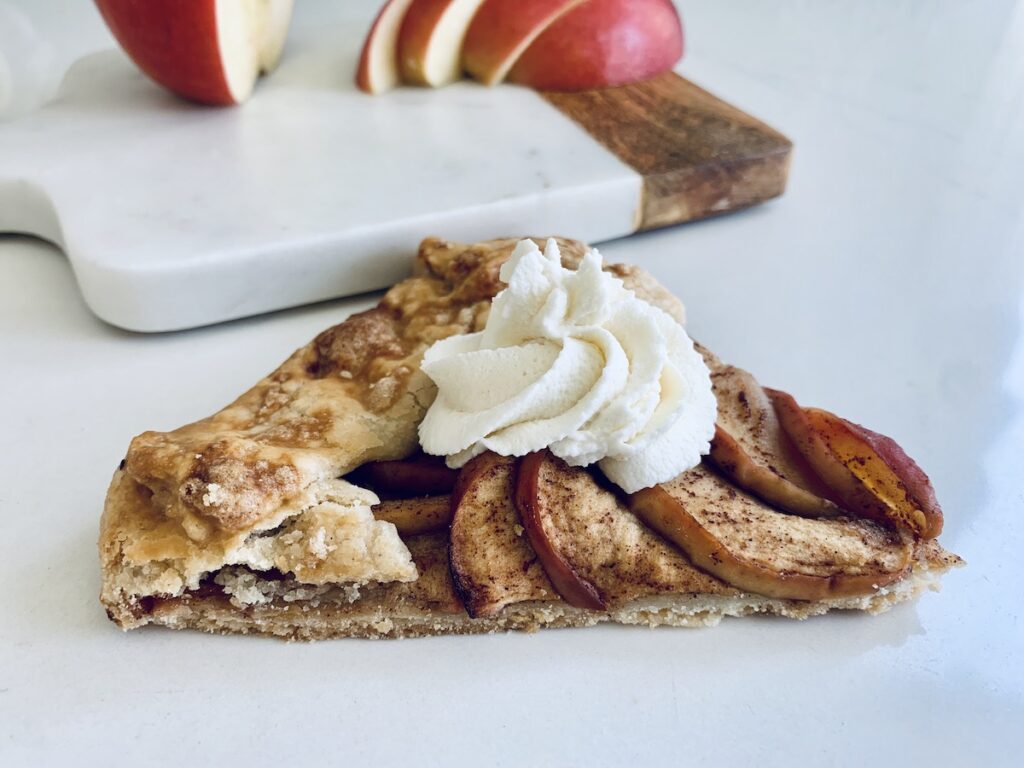
Serving Tip
Serve this gluten-free apple galette warm, topped with maple whipped cream or your favorite gluten-free ice cream for the perfect finishing touch!
Substitutions
Here are a couple of easy substitutions that don't require any complicated adjustments to the recipe:
- Pear Galette: For another popular fall fruit option, this recipe works well with pears. Avoid over-ripe pears, as they will add too much moisture to the recipe, leaving you with a soggy crust.
- Apple-Cranberry Galette: Increase the brown sugar used to coat the apples to ¼ cup, to offset the tartness of the cranberries. Sprinkle ¼ cup of cranberries on top of the apple circles, just before folding over the edges of the crust.
Make It Dairy-Free!
- Replace butter with non-dairy butter.
- Verify your crust is dairy-free.
My homemade gluten-free pie crust recipe is not dairy-free. Store-bought Sweet Loren's Gluten-Free Pie Crust is dairy-free, and Bob's Red Mill Gluten-Free Pie Crust Mix can be, if you follow the all-shortening option on the back of the bag.
Storage
Store at room temperature for 1-2 days. Refrigeration is not recommended, as the crust will dry out.
Frequently Asked Questions
Honeycrisp and Pink Lady apples are the ideal blend of sweet and tart for a just-right, gluten-free apple galette. They are firm and hold up well to baking, without making the crust soggy. Alternatively, you can use Fuji apples for a sweeter galette and Granny Smith for a tart flavor palette.
You can make the galette a day or two ahead if needed, but it is best enjoyed the day it's made. With only 15 minutes of prep time and 40 minutes to bake, this is an easy dessert to make the day you plan to serve it. Save time on the day of by either making your gluten-free crust ahead of time or purchasing a store-bought crust.
Refrigeration is not recommended, as the crust will dry out in the fridge after a day or so. Store the gluten-free galette at room temperature, and enjoy within 1-2 days.
This is personal preference, but unpeeled apples add nutrients, fall color, and texture, while saving time.
Fall Dessert Recipes
- Amazing! Gluten-Free Pumpkin Cheesecake Bars
- 6-Ingredient Cranberry Pear Crisp (Gluten-Free!)
- Eggnog Crème Brûlée
- Gluten-Free Pumpkin Cinnamon Rolls (Dairy-Free)
- Gluten-Free Apple Roses in Puff Pastry
- Gluten-Free Pumpkin Pie Recipe
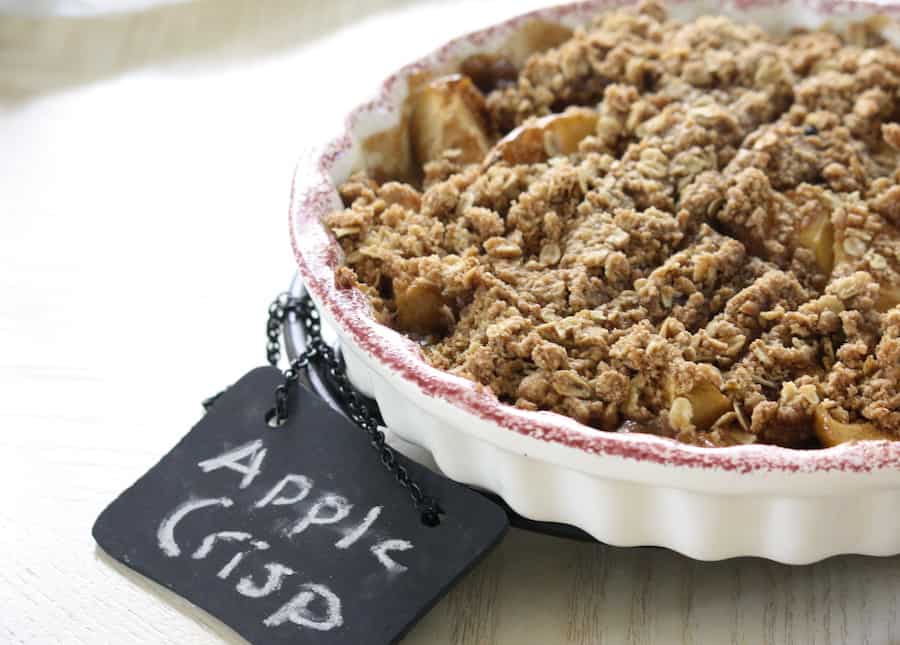
- Gluten-Free Apple Crisp (Dairy-Free Option)
- Gluten-Free Mini Cranberry Tarts: Easy Recipe!


I hope you love this Gluten-Free Apple Galette as much as we do! If you give it a try, please leave a comment and star rating below. I'd love to hear from you!

Gluten-Free Apple Galette
Ingredients
- 1 gluten-free pie crust dough Use one crust from Go Gluten Freely's easy gluten-free pie crust recipe, or use store-bought Sweet Loren's Gluten-Free Pie Crust.
- 2 apples cored and sliced (not peeled), approximately ⅛-inch thick slices
- 3 tablespoons dark brown sugar packed
- 1 tablespoon lemon juice
- 1 tablespoon cornstarch
- 1 teaspoon ground cinnamon
- 2 tablespoons butter cut into ¼-inch cubes
- 1 large egg beaten
- 1 teaspoon water
- 1 tablespoon sugar
Instructions
- Preheat oven to 400℉.
- On parchment paper, roll out pie crust dough to approximately 12" round. The edges can be uneven, adding to the beautiful, rustic appearance of the galette.
- Return the dough to the fridge while preparing the filling.
- Toss sliced apples, brown sugar, lemon juice, cornstarch, and cinnamon in a large bowl until the apples are coated.
- Transfer the dough and parchment paper to a baking sheet. Arrange overlapping apple slices on top of the dough in two circles, starting with the outer circle 2" from the edge of the crust. Then fill in the center of the galette with a smaller circle of apples.
- Fold the edges of the dough toward the center, pleating occasionally as you fold. Dot apple filling with butter.
- In a small bowl, beat the egg and water, then brush it on the crust. Sprinkle the crust with sugar. For best results and a flaky crust, chill the prepared galette in the refrigerator for 10 minutes before baking.
- Bake in the bottom third of the oven at 400℉ for approximately 40-45 minutes until the apples are tender and the crust is golden.
- Carefully transfer the galette to a wire rack and cool for 10 minutes before slicing.


Leave a Reply