This gluten-free pie crust is, well... easy as pie! And every bit as delicious and flaky as a traditional wheat flour pie crust. It works well in savory gluten-free chicken pot pie and sweet gluten-free pumpkin pie.

Unlike bread, the magic in pie crust is not in the gluten. The magic is in the fat. This makes it fairly simple to replicate an amazing pie crust without gluten, like in my even-easier-than-pie, gluten-free apple galette.
In fact, gluten can be overworked and "over-watered," resulting in a tough pie crust. Without the added structure of gluten, this easy gluten-free pie crust is always exceptionally tender and flaky.
Jump to:
Why You'll Love Gluten-Free Pie Crust
- It's flaky and delicious. The rich buttery bits in the dough melt into a perfect, flaky pie crust, every bit as good as your grandma's traditional pie crust. No one will ever know it isn't a "regular" pie crust.
- It's so quick and easy! Pie crusts have developed a reputation for being intimidating. While there are a couple of essential elements, it's not complicated. Just follow these simple directions, and in 10 minutes, you'll have two pie crust disks chilling in your fridge waiting to be rolled out and filled with your favorite pie filling.
- You can make it ahead. The pie crust dough will keep in the fridge for up to two days and in the freezer for up to three months.
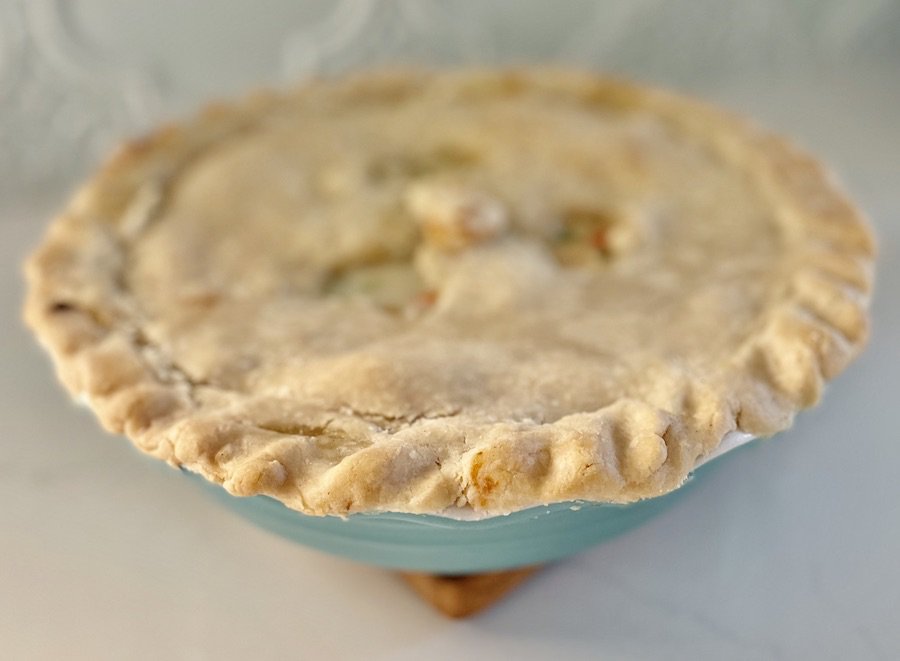
- The recipe makes two crusts. That's enough for one double-crust pie or two single-crust pies. One of my favorite uses is "one now and one later". For example, use one crust for gluten-free pumpkin pie on Thanksgiving and the other to top a gluten-free, leftover-turkey pot pie the day after. So many good excuses for pie!
- You only need five ingredients that are likely staples in your gluten-free kitchen. Meaning, you can enjoy this pie crust anytime!
Summarize & Save This Content On....
Five Simple Ingredients

If you have a gluten-free kitchen, you likely already have these five staples on hand: butter, gluten-free flour, salt, sour cream, and ice water.
This recipe has been tested with King Arthur's Gluten-Free Measure for Measure Flour. It's an easy-to-use, gluten-free baking flour that can often be swapped 1-to-1 for regular flour. It is my go-to gluten-free flour for non-yeasted recipes. If you choose a different gluten-free flour, be sure that it contains xanthan gum, a helpful binder for gluten-free baking.
Ingredient Tips
- Measure gluten-free flour correctly. Either use an inexpensive kitchen scale to measure by weight (most accurate) or use the spoon-and-level method (use a spoon to fill your measuring cup with flour, then use the back of a knife to sweep the excess flour off the top).
- Cold butter is the most important ingredient in this crust. Start with cold butter, and follow the recipe instructions to keep the butter cold all along the way. When the butter melts during baking, it will leave behind pockets of air and a perfectly flaky crust.
- Place water and ice in a cup for at least a minute to get it ice cold. I prep my ice water right after cutting the butter into cubes, giving it time to chill while I mix the other ingredients.
- Don't skip the sour cream. It adds tenderness and flakiness to the finished pie crust and makes the dough easily workable.
How to Make Gluten-Free Pie Crust

Step 1
Cut the butter into small ½-inch cubes. Place the butter cubes in the freezer while prepping and measuring other ingredients. The butter will soften slightly when you cut the cubes. Return it briefly to the freezer, so it stays cold -essential for a flaky crust.

Step 2
Add flour and salt to a large mixing bowl. Stir the flour and salt with a whisk to combine.
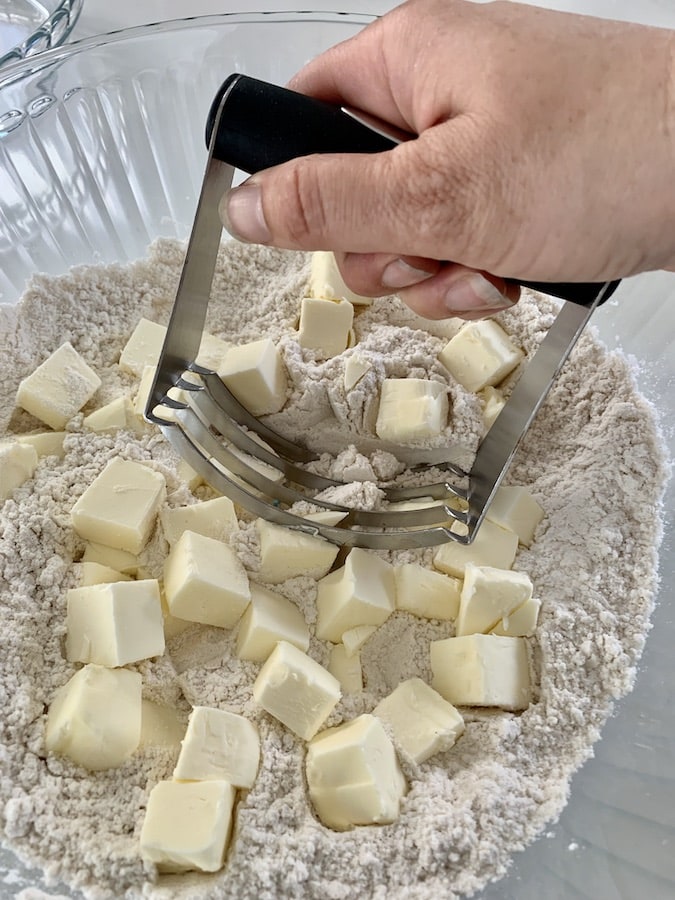
Step 3
Add cold butter cubes to the flour-salt mixture. Use a pastry cutter to cut the butter into the dry ingredients. Do not over-mix. The dough should be rough and crumbly with pea-sized chunks.


Step 4
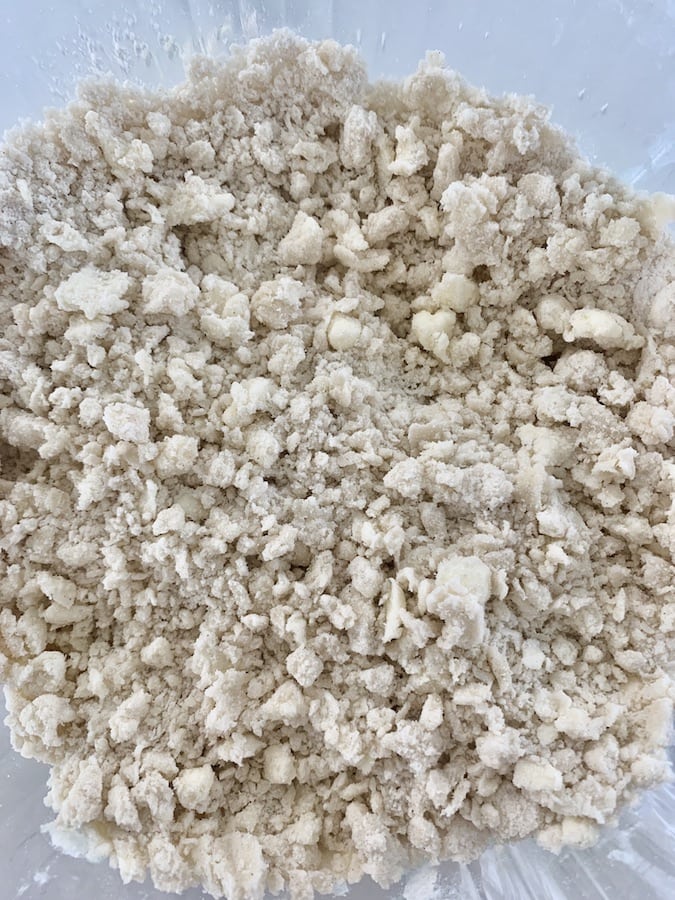
Stir in the sour cream. Then, slowly drizzle 1-2 tablespoons of ice-cold water over the mixture. Gently stir or use your hands to combine.
The dough will remain rough, not wet. It should press together easily with the consistency of cookie dough.
If the dough is too dry to hold together, add an extra tablespoon or two of ice water as needed.
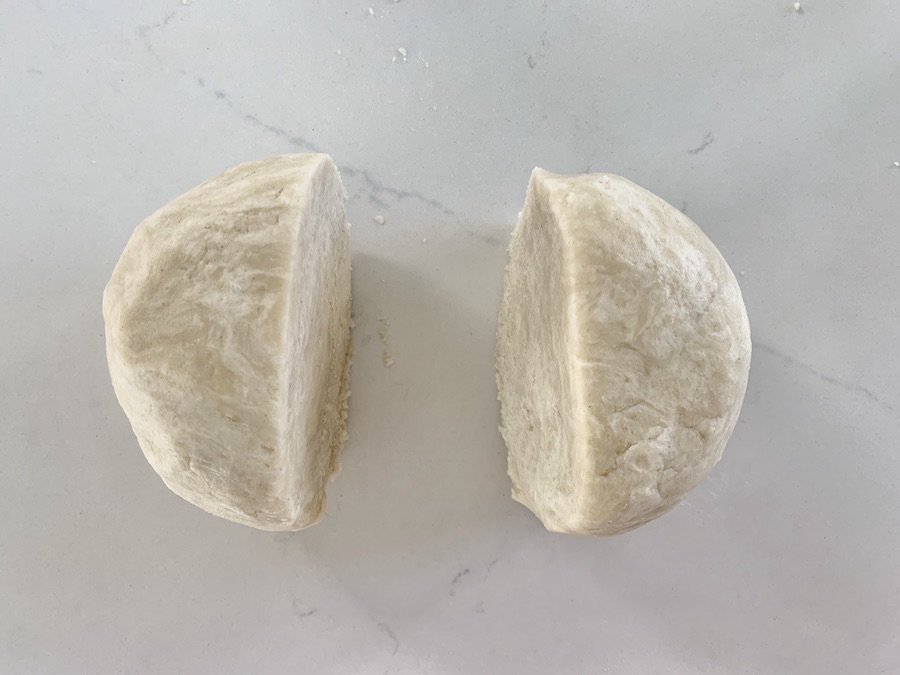
Step 5
Use your hands to form a dough ball. Put the dough ball on the counter. Divide in two. If making a double-crust pie, you can opt to add a little more dough to one "half", allowing for more dough to roll out a larger bottom crust.
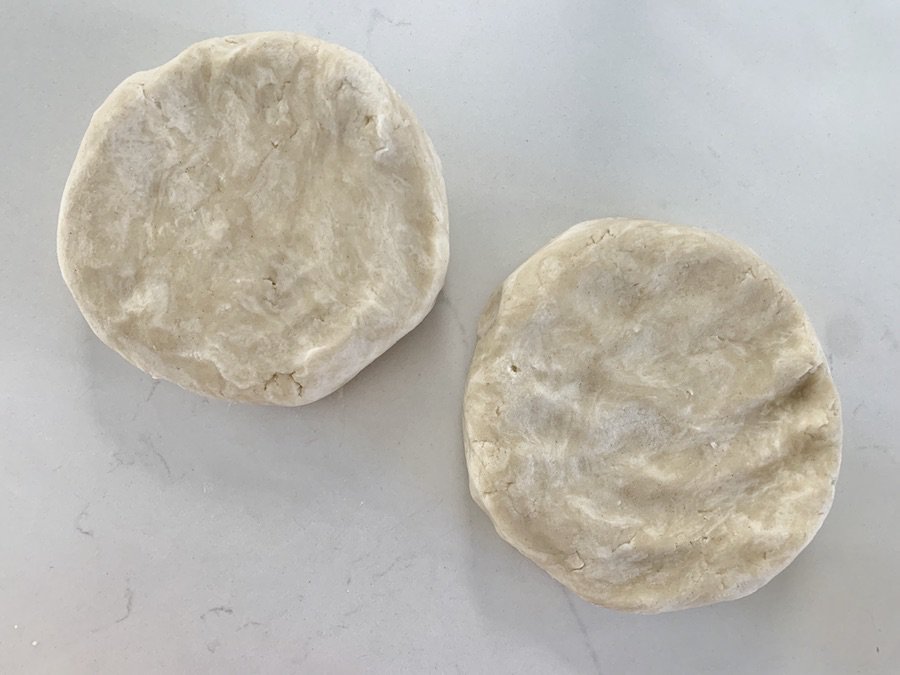
Step 6
Press each half into a flat disk about 1" thick.
Wrap each disk tightly in plastic wrap and store in the fridge for one hour (up to two days) before rolling out your pie crust.
When you're ready to make a pie, roll out the dough, then fill and bake according to the instructions for your pie recipe.
Expert Dough Tips
- Add more water if needed. Don't stress if you need a few extra tablespoons of water (a little at a time). When baking a traditional wheat-flour pie crust, excess water will activate the gluten, creating too much structure and a tough crust. Not so with gluten-free pie dough! Add what you need to be able to roll the dough out. Just not so much that it becomes sticky and difficult to work with.
- Work quickly to keep the dough cold. If the dough starts to get too soft, return it to the refrigerator for a few minutes to chill.
- Do not over-mix the dough. Those little pea-sized pieces of butter will melt during baking, creating the perfect, flaky crust.
- Use excess dough from the edges to patch any cracks or tears. Press together with your fingers. The dough is forgiving, and imperfections will be hidden under the pie filling.
- Chill the dough one last time. If using a metal pie pan, just before baking, place the prepared pie crust and metal pie pan in the refrigerator for 10 minutes to firm up the dough one last time. If you are using a glass/Pyrex pan, skip this tip. Pyrex is not designed to go from a cold fridge to a hot oven.
How to Parbake Gluten-Free Crust
For the best results, I recommend par-baking the crust when making a pie with a custard or fresh fruit filling, like gluten-free pumpkin pie or gluten-free strawberry rhubarb pie.
Parbaking a pie crust is simply partially ("par") baking the bottom crust of the pie before adding the wet filling, so it sets and doesn't get soggy.

- Step 1: Preheat oven to 450℉. Using parchment paper and a light dusting of flour, roll out one refrigerated pie crust until it is approximately 12" round.
That beautiful marbling in your dough means flaky crust for your finished pie!
- Step 2: Place the dough in a pie dish. Gently press it down so that it is fully set into the bottom edges of the pan.
- Step 3: Edging:
Single-crust pie: Cut any excess crust to about ½-1 inch from the edges of the pie pan. Fold the edges of the crust to create a tall, thick border. Press the side of your pinky or thumb into the crust at an angle, repeating around the entire edge. Alternatively, crimp with a fork or decorate however your grandma taught you!
Double-crust pie: Remove the excess pie crust from the edges of the pie pan. You can make a decorative edge later with the top crust.
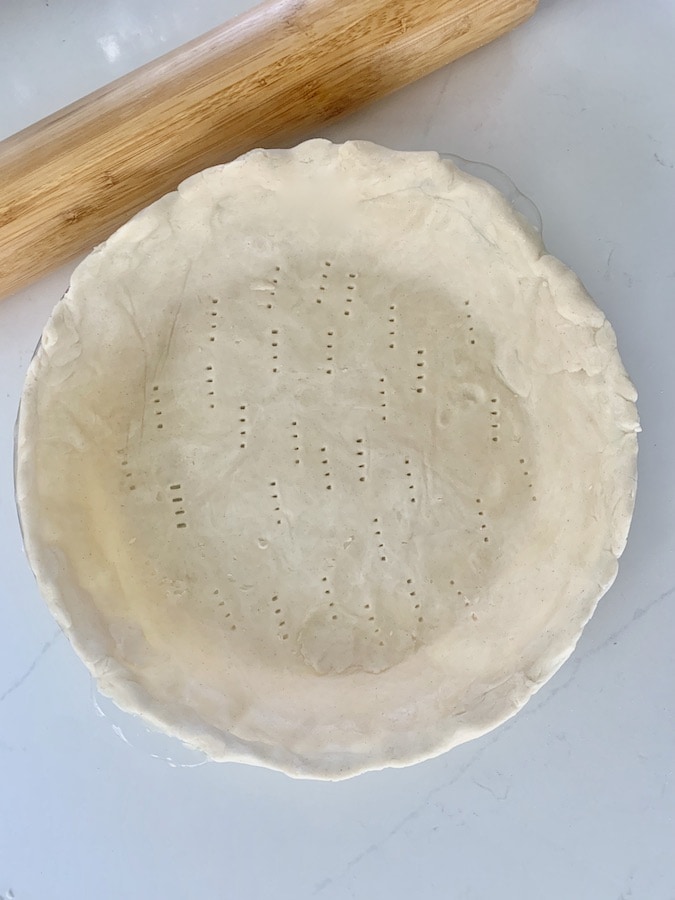
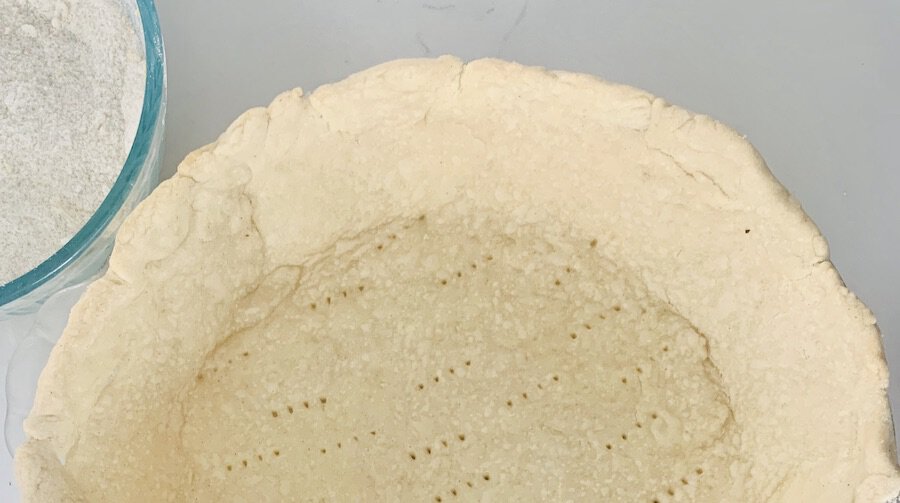
- Step 4: Poke the bottom of the crust with a fork to prevent it from puffing up while baking.
- Step 5: Before baking, cover the edges with a pie shield to prevent burning. (For more even baking of the crust base, place the pie pan on top of a baking sheet in the oven.) Place in the bottom third of the oven and bake for 10 minutes at 450℉.
Storage
Store pie dough disks in the refrigerator for up to two days and in the freezer for up to three months. If freezing, move the dough to the refrigerator the day prior to using, so it is workable when rolling out.
Recipes That Use Gluten-Free Pie Crust:


Frequently Asked Questions
No, a good gluten-free pie crust (like this one!) does not taste different. This recipe has the flavor and texture of a traditional wheat-based pie crust. The ingredients and the simple recipe steps (which keep the butter cold) create a perfect flaky crust. It is undetectably gluten-free!
Yes, you can freeze these gluten-free pie crust disks for up to three months. Wrap each disk tightly in plastic wrap and place them in a freezer-safe bag or container. Be sure to label it and add the date. The day before you plan to make your pie, move the disk from the freezer to the refrigerator, so it is workable when you roll it out.
Mix in a little ice water, one tablespoon at a time, until the dough is workable and presses together, but is not sticky.
While some recipes call for mixing the gluten-free pie dough in a food processor, I don't recommend it. It is too easy to overmix in a food processor. A pastry cutter is quick and easy to use, and it gives you more control over leaving pieces of butter in the dough. With a pastry cutter, you'll achieve a beautifully marbled dough that produces a flaky crust.
In a pinch, Wholly Gluten Free makes pre-made gluten-free pie shells in a pan, sold in a two-pack, and ready to fill and bake. I find them in the freezer section of Sprouts and Albertson's. During the holidays, they are often available at Trader Joe's. Use Wholly Gluten Free's product locator to find store-bought gluten-free pie crust near you.
Note, Wholly Gluten-free pre-made crusts are slightly smaller than typical, so you may end up with a little leftover filling - do not overfill.
Yes, it is generally a seasonal item, found in the freezer section.
My go-to flour is King Arthur Gluten-Free Measure for Measure flour. It is easy to work with and delivers consistently excellent results when making gluten-free pie crusts. It also includes xanthan gum, an important binder in gluten-free dough. As a mom, I also like that the ingredients are heavier on whole grains over starches than other 1-to-1 replacement flours. Plus, it includes a vitamin and mineral blend.
I hope you love this Gluten-Free Pie Crust as much as we do! If you give it a try, please leave a comment and star rating below. I'd love to hear from you!

Gluten-Free Pie Crust Recipe
Equipment
- Kitchen Scale (recommended for accurately weighing gluten-free flour, not required)
Ingredients
- 1 cup cold unsalted butter
- 2 ½ cups King Arthur Gluten-Free Measure for Measure Flour plus extra for dusting when rolling out crust
- 1 teaspoon salt
- ½ cup sour cream
- 1-2 tablespoons ice water (place a few ice cubes in a cup of water to chill while you mix the other ingredients)
Instructions
Pie Crust Dough
- Cut butter into small ½-inch cubes. Place butter cubes in the freezer while prepping and measuring other ingredients.
- Add flour and salt to a large mixing bowl. Stir with a whisk to combine.
- Add cold butter cubes to the flour-salt mixture. Use a pastry cutter to cut the butter into the mixture. Do not over-mix. The dough should be rough and crumbly with pea-sized chunks.
- Mix in sour cream. Slowly drizzle 1-2 tablespoons of ice-cold water onto the mixture and stir or use your hands to combine. Dough should still be rough, not wet, but will easily press together with the consistency of cookie dough. If needed to hold the dough together, add another tablespoon or two of ice water. Use your hands to form a dough ball.
- Put the dough ball on the counter. Divide in two. Then press each half into a flat disk about 1" thick.
- Wrap each disk in plastic wrap and store in the refrigerator for 1 hour (up to 2 days) before rolling out your pie crust.
- Roll out the dough, fill, and bake according to the instructions for your pie recipe.
Parbake Bottom Crust (recommended for fresh fruit or custard pie fillings)
- Preheat oven to 450℉.
- Using parchment paper and a light dusting of flour, roll out 1 pie crust and place it in a pie dish. Gently press the dough down so that it is fully set into the bottom edges of the pan.
- Double-crust pie: remove excess pie crust from the edges of the pie pan. Single-crust pie: make a decorative edge. Cut excess crust to about ½-1 inch from the edges of the pie pan. Fold edges of the crust to create a tall, thick border. Press the side of your pinky or thumb into the crust at an angle, repeating around the entire edge.
- Dock/poke the bottom of the crust with a fork. Cover the edges with a pie shield, put the pie pan on a baking sheet, and place it in the bottom third of the oven. Bake for 10 minutes at 450℉.
- Fill and bake according to the instructions for your pie recipe.
Notes
- Store butter cubes in the freezer while you prep and mix your other ingredients.
- Work quickly and don't overmix the butter and flour mixture.
- Use ice-cold water. Add ice to cold water and leave for at least a minute before measuring out 5-7 tablespoons.
- Store pie crust disks in the fridge for 1 hour before rolling out crusts.
- Work quickly when rolling out the crust. If the dough gets sticky or breaks easily, return to the fridge for a few minutes.
- If using a metal pie pan, which can handle extreme temperature changes, chill your crust for 10 minutes before baking.


Tami Garrow says
I am using Earth Balance rather than butter, may I use something other then sour cream in the crust? My daughter has celiac, and her husband is allergic to dairy. Help!
Heather King says
Hi, Tami! I would use non-dairy yogurt in place of sour cream. Use one with the highest fat content you can find. It will add extra fat and help make the pie dough more workable than omitting the sour cream altogether. I have not tested the recipe with Earth Balance, but I know you can substitute the butter in the recipe with butter-flavored Crisco and it still comes out flaky. If you decide to stick with Earth Balance, be sure to follow the recipe instructions for keeping the "butter" cold. Please come back and let us know how it goes to help other readers!
Cathy says
Can plain Greek yogurt be substituted for the sour cream?
Thanks!
Heather King says
Hi, Cathy! I have not tested this recipe with plain, Greek yogurt, but I do frequently interchange them when cooking and baking with excellent results. Be sure to use a full-fat, plain, Greek yogurt. Please let me know how it turns out!
Chantal Cleroux says
Can the dough be frozen?
GoGlutenFreely says
Absolutely! I sometimes double the recipe and freeze the dough to have on hand, or even use one for a single-crust pie and freeze the other for later. Wrap each disk separately in plastic wrap (I then place the wrapped-disks in a dated freezer bag). Move the dough to the fridge the day before you plan to use it, as it would be impossible to roll out from frozen.
Donna Kaye Drew says
Do I bake the crust longer than 10 minutes if I need a fully baked crust to add a filling too?
GoGlutenFreely says
After 10 minutes, it is only par-baked (partially-baked). If your pie filling is fully cooked, like a chocolate cream pie, after par-baking the crust for 10 minutes at 450℉, lower the oven to 400℉ and bake for about 20-25 more minutes until the edges are golden brown.
Bob dole says
Good recipe
GoGlutenFreely says
Thank you! Enjoy!
Melonie Fisher says
Sour cream is listed on the recipe card, but not in the step by step description above. Which is correct?
GoGlutenFreely says
Good eye, Melonie! With sour cream is correct, along with the reduced cold water. I updated the crust recipe just in time for Thanksgiving, but did not have a chance to fix the narrative, yet, due to traveling. I'll update soon. The crust is still quick, easy, and flaky! But, now, thanks to a little sour cream, it’s more workable when you roll it out and the taste and flaky texture are even better.
Update: It's updated now!