These are the real deal. No second-class, gluten-free cinnamon rolls here. These homemade gluten-free rolls are every bit as good as any regular cinnamon roll you have ever tasted.
In fact, my son says they are better. Not only is he brutally honest, but he is also a self-described expert on the difference between gluten-free food and "regular food". My son is a gluten-eater living with a celiac mom and sister. If he says it's as good as gluten, it is.
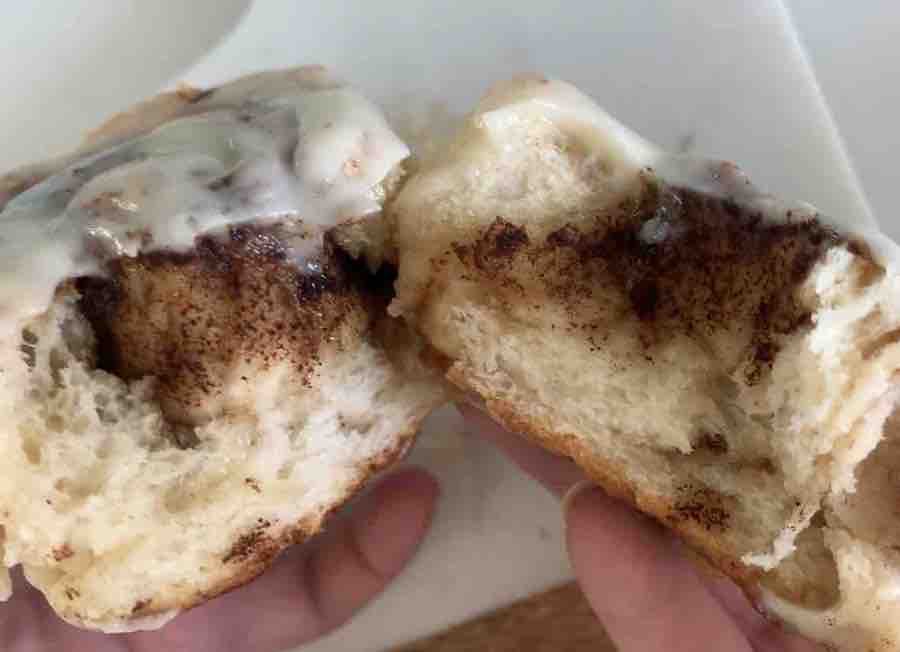
These cinnamon rolls are soft and fluffy. And gooey. And full of flavor.
I made a lot of cinnamon rolls when creating and testing the recipe. Which meant, many lucky people got to taste-test them. Between the mmmmmmms and scraping every last bit of filling and cream cheese frosting off the plate, I got a lot of, "These are gluten-free?"
Yes, they are gluten-free. And no one will ever know unless you tell them. No need to give a gluten-free speech before you serve them.
The secret to the perfect texture is the flour.
King Arthur Gluten-Free Bread Flour
Disclosure: King Arthur gave me the flour used to create this recipe. All other ingredients were purchased by yours truly. This is not a sponsored post, but there are affiliate links in the post, both for King Arthur & Amazon. This means if you click on a link and make a purchase, Go Gluten Freely will receive a small commission at no cost to you.
Some of the links on this post are affiliate links. To learn more, visit our Disclosures.
This amazing gluten-free cinnamon roll recipe is made using King Arthur Gluten-Free Bread Flour. The flour ingredients are gluten-free wheat starch, corn starch, cellulose and psyllium fiber blend, sorghum flour, pea protein, xanthan gum, and enzymes.

You read that correctly. Gluten-Free wheat starch.
This is not an oxymoron.
Gluten-free wheat starch has been processed to remove the gluten-protein, which is the part of wheat that causes an autoimmune reaction for those of us with celiac disease. To be labeled gluten-free in the United States, wheat starch must contain below 20 parts per million of gluten, a level generally accepted as safe for individuals with celiac disease.
To learn more about gluten-free wheat starch, read "Is Gluten-Free Wheat Starch Safe for Celiacs?"
Important! Gluten-free wheat starch is not safe for individuals with a wheat allergy. Please do not use this recipe if you have a wheat allergy.
It is the gluten-free wheat starch in this recipe, together with the rising power of yeast, that gives these cinnamon rolls the perfect texture and flavor.
Flour Substitutes
This recipe was specifically formulated for the unique properties of gluten-free wheat starch, so other types of gluten-free flours will not work.
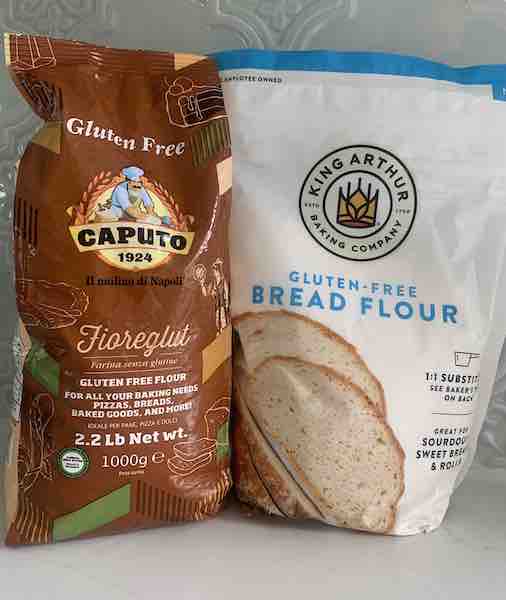
The only substitute gluten-free flour blend I tested and can absolutely recommend is Caputo Fioreglut Gluten-Free Flour, which is a gluten-free wheat starch-based flour widely used by celiacs in Italy. It has a gluten-free seal from the Italian Ministry of Health.
You will need approximately 5 ⅓ cups of Caputo Fioreglut Gluten-Free Flour to equal 480 grams. The rolls made with Caputo Fioreglut Gluten-Free Flour were just as amazing as the King Arthur ones.
If you want to test another gluten-free wheat starch blend, use 480 mg of flour measured on a kitchen scale. You'll need 480 grams of flour to work well with the liquids in this recipe.
Be aware that not all wheat starch is gluten-free. Look for the gluten-free label to be certain that the flour is below 20 parts per million gluten, per FDA rules.
Instructions
The recipe itself is very easy. In about 20 minutes, you'll simply be waiting for your formed cinnamon rolls to fully rise and be ready for the oven.
Make the Dough
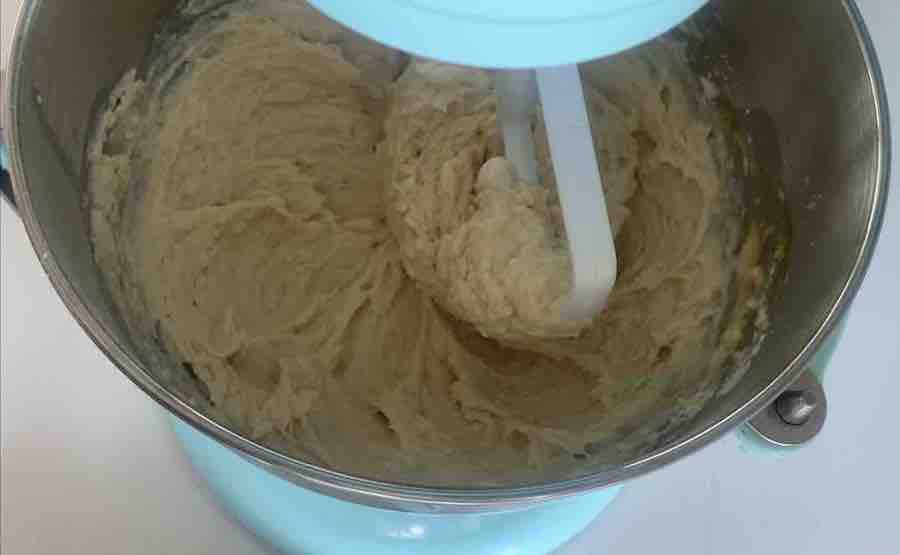
Combine all of the "dough ingredients" in a stand mixer.
The gluten-free dough will be a bit wetter than traditional wheat flour dough, so the dough hook is not ideal. Use the flat beater paddle attachment to mix on low for five minutes.
Stop the mixer to occasionally scrape the sides of the bowl with a spatula.
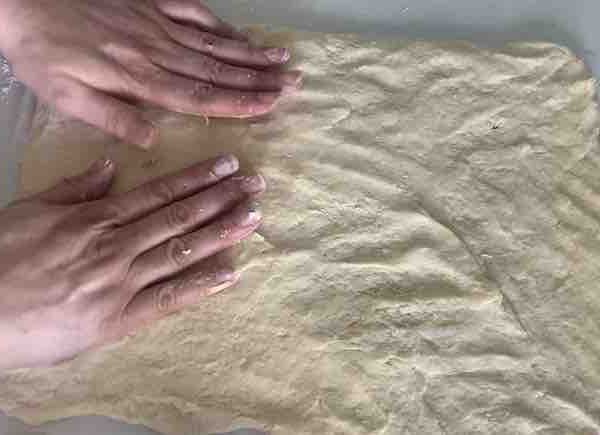
Place the dough on a sheet of parchment paper or a silicone mat. Gently press and stretch the dough into a 10×15-inch rectangle.
As I stretch out the dough, I occasionally lift it slightly from the parchment paper to make sure it's not sticking. This will make it easier to work with when rolling the dough into a log.
Make the Cinnamon Filling
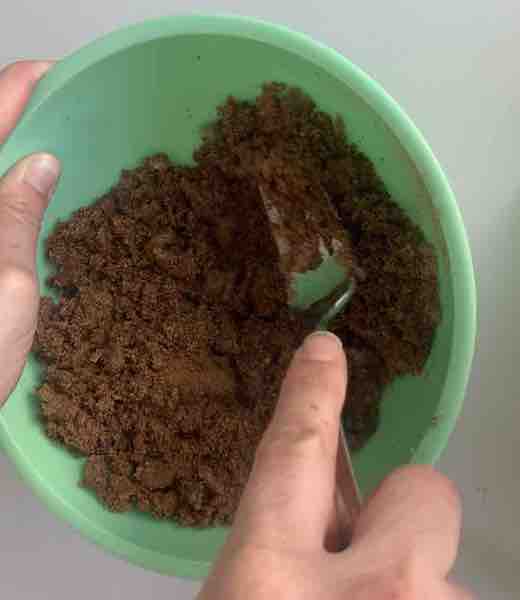
In a small bowl, combine all "cinnamon-filling ingredients" with a fork until well-mixed and crumbly.
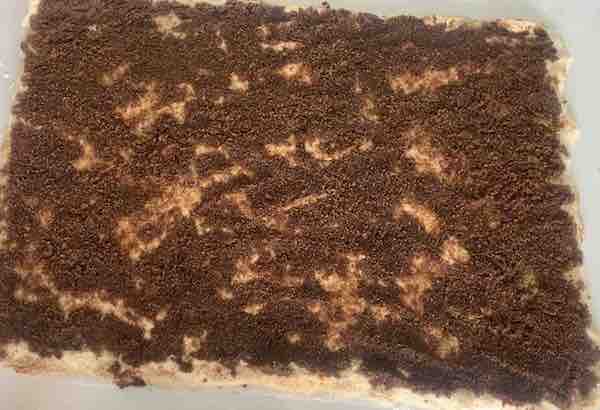
Sprinkle the cinnamon mixture on top of the dough. Gently press it into the dough with your hand. This will help the mixture to stay in place when you roll the dough into a log and slice the individual rolls.
Shape the Rolls
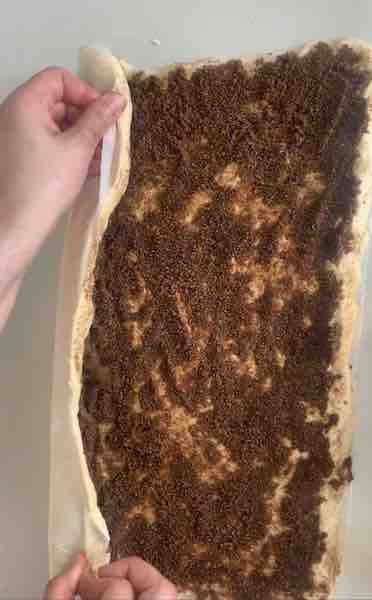
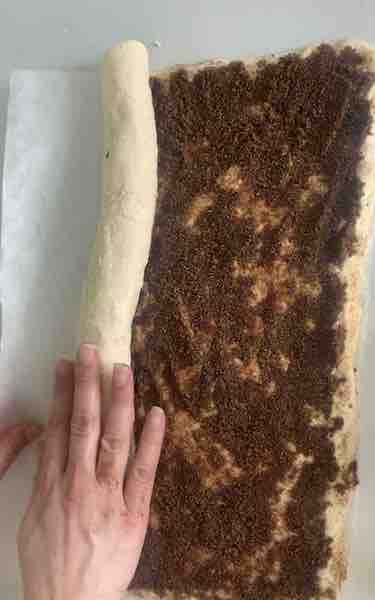
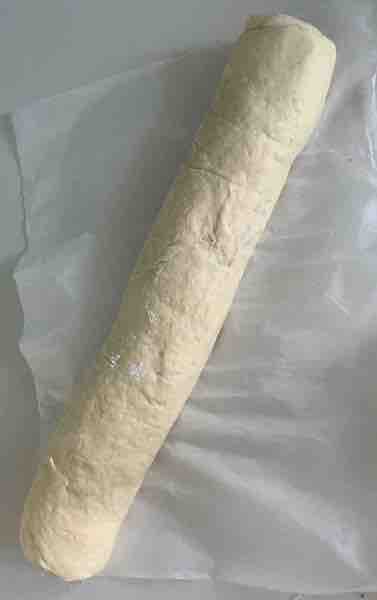
Tightly roll the long side of the dough to form a 15"-long log.
The parchment paper takes the mess out of this job and makes it so easy. Grab and lift the parchment paper to get the roll started. Pull back and remove the parchment paper little by little as you roll the dough into a 15" long log.
No worries if the dough tears slightly. Just patch it back together and keep rolling.
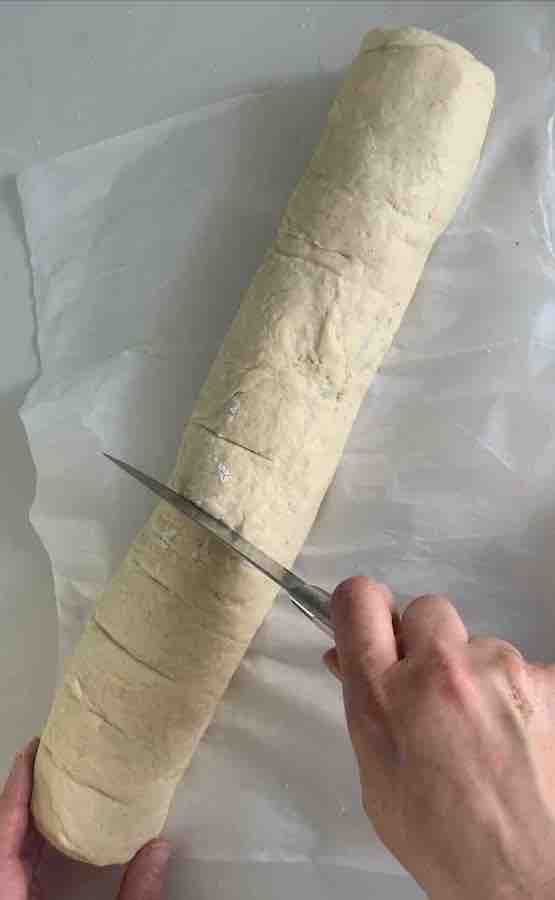
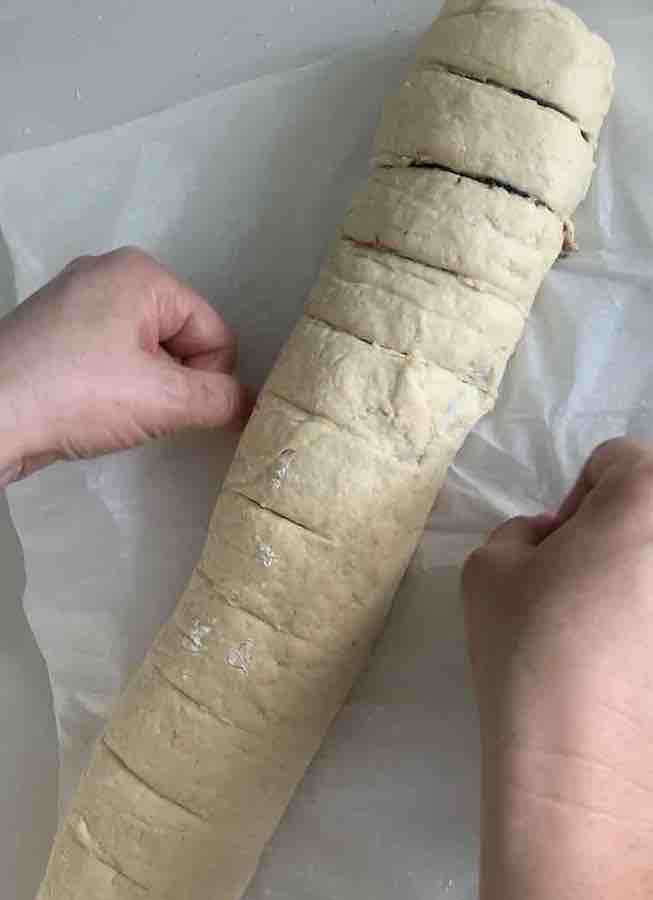
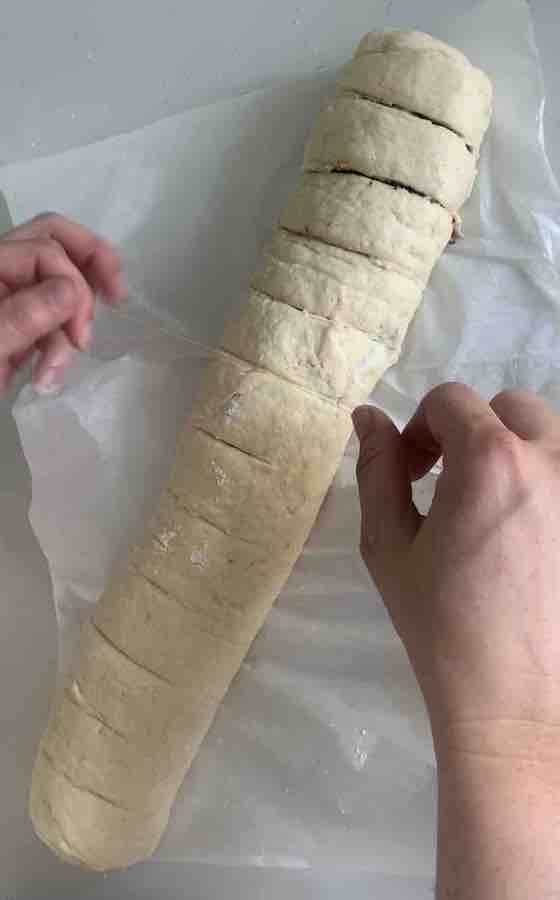
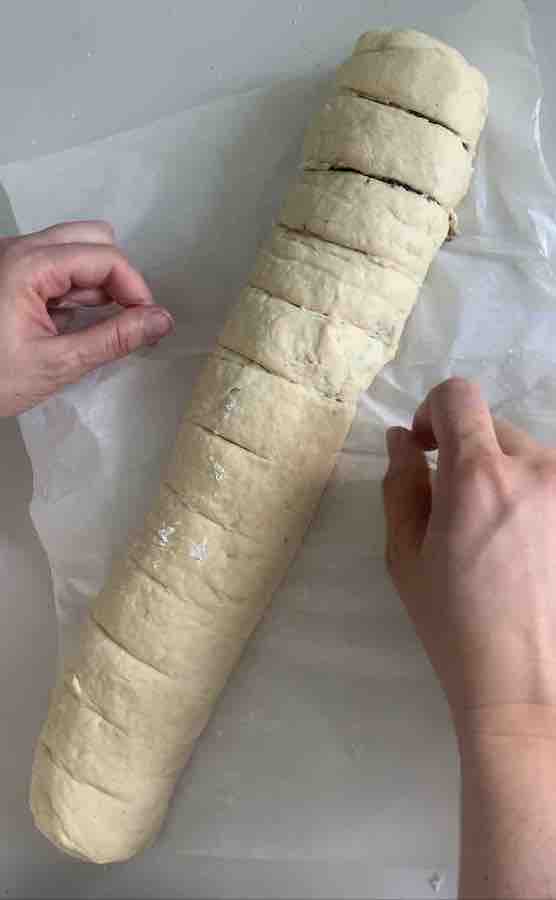
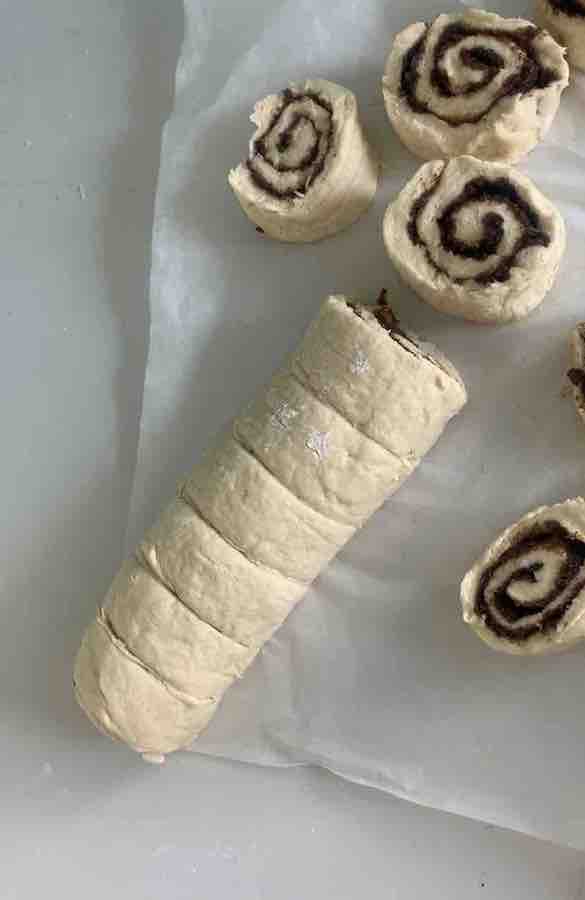
Gently score the top of the log marking 11 lines to make 12 even cinnamon rolls.
Use thread or unflavored dental floss to cut out the cinnamon rolls. It gives a nice clean cut, and, unlike a knife, thread does not squish the rolls.
Slide the thread under the log and toss both ends of the thread over the top of the roll. Grab each end of the floss and pull to cleanly slice off a cinnamon roll. Continue until you have 12 rolls.
Let Rise, Then Bake the Rolls
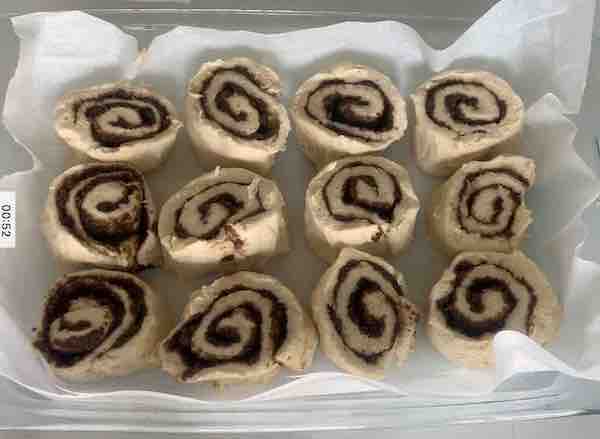
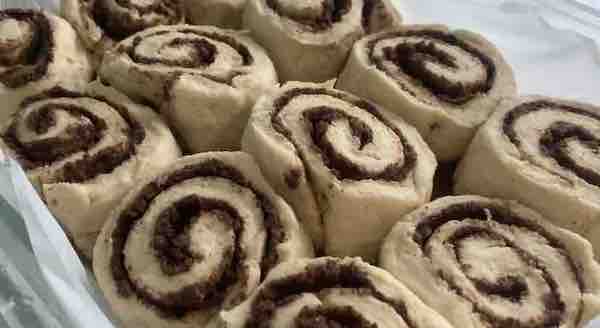
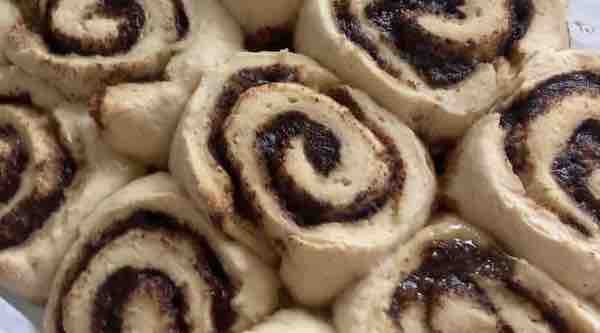
Place cinnamon rolls in a baking pan lined with parchment paper. A little liquid from the cinnamon filling will leak out while the rolls rise, and icing can make quite a mess. You'll be glad you used parchment paper for easy cleanup!
Cover the baking pan with a sheet of plastic wrap. Let the dough rise for 2 hours before removing the plastic wrap to bake.
Preheat the oven to 350℉. Bake rolls for approximately 25-27 minutes until lightly golden brown.
Make the Icing & Frost the Rolls

Mix the "icing ingredients" with a stand mixer (or in a medium bowl with a hand mixer) until the icing is creamy.
Use a spatula to generously spread the icing over the warm cinnamon rolls and watch it melt.
Devour.
Overnight Cinnamon Rolls
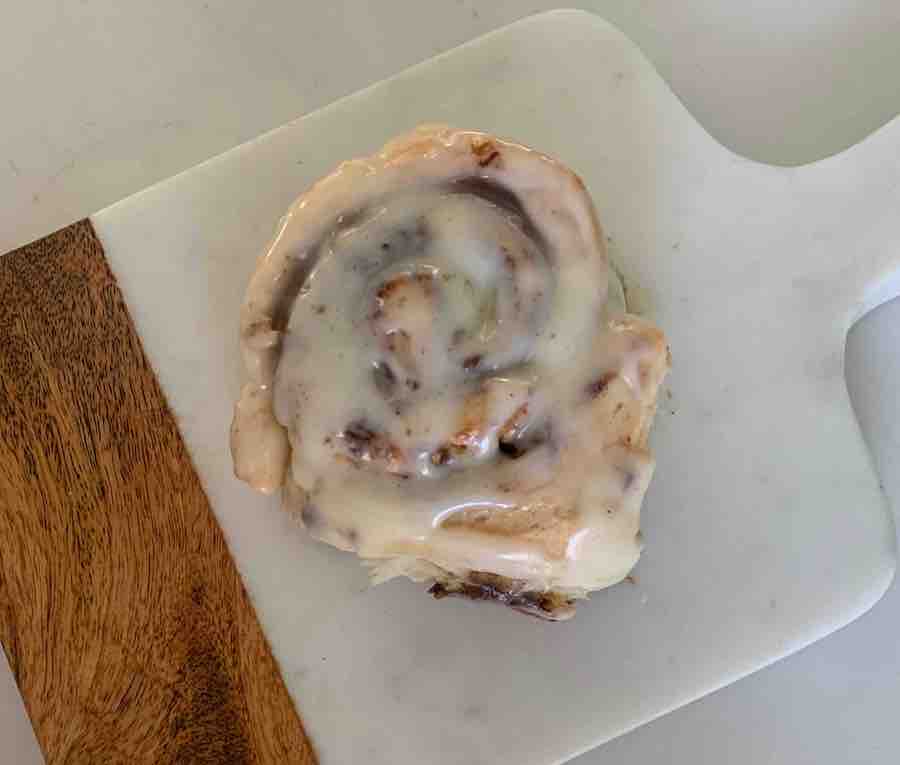
This is by far my favorite way to make cinnamon rolls. The make-ahead option allows you to prep the rolls the day before, let them rise overnight, and serve fresh, warm cinnamon rolls for breakfast.
Overnight cinnamon rolls are ideal for sleepovers, celebration brunches, and busy holidays. Try this gluten-free Eggnog Cinnamon Roll for Christmas morning or gluten-free, dairy-free Pumpkin Cinnamon Roll throughout the fall.
Even though the yeast works more slowly in the refrigerator, you won't need as much of it, due to the long rise time. Reduce the yeast in the recipe to one heaping teaspoon.
Once you've sliced all 12 cinnamon rolls and placed them in the parchment-lined baking pan, cover them with plastic wrap and place in the fridge for 8-24 hours. Let the yeast do its work.
You can also pre-make and refrigerate the icing. Or make it the next day, while the rolls bake.
When you're ready to bake the cinnamon rolls, remove the baking pan from the refrigerator, remove the plastic wrap, and place the pan of rolls on top of the stove.
It will be slightly warmer on top of the stove than the rest of your kitchen, helping the rolls quickly reach room temperature while the oven preheats.
If you premade the icing, also set it out to soften at room temperature.
Preheat the oven to 350℉ and follow the rest of the recipe as written.
Cut the Recipe in Half
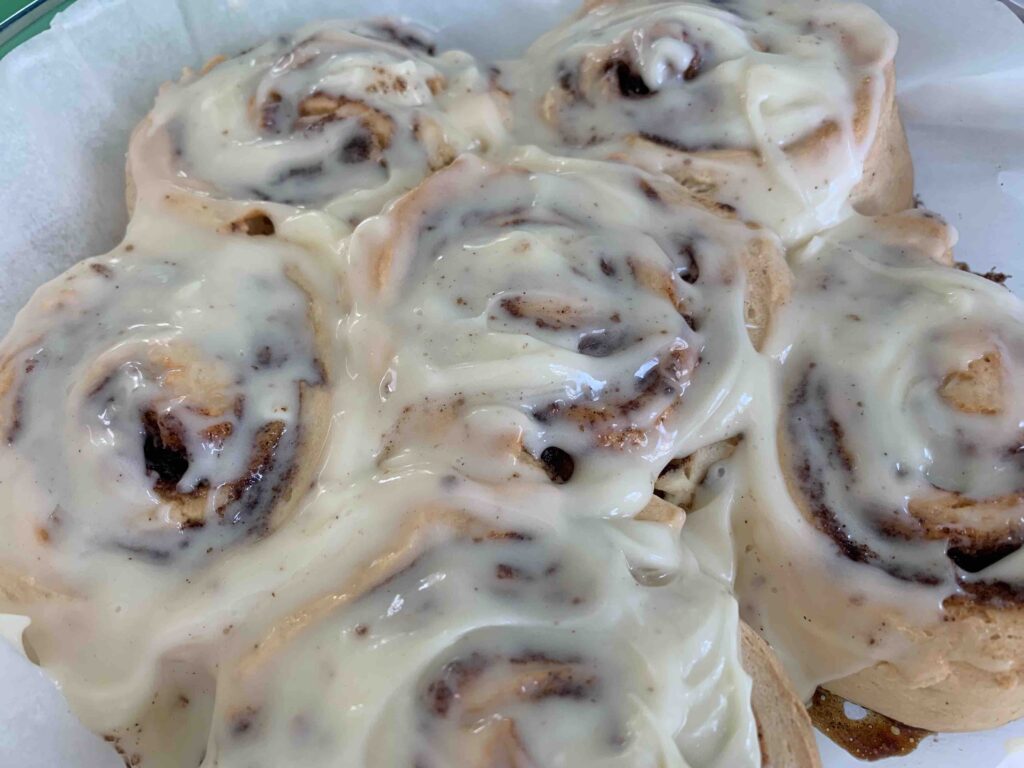
If the temptation of having a dozen gluten-free cinnamon buns around is too much, consider making half the recipe.
Most of the adjustments are basic math, but here are a couple of quick tips to make it easier:
- 1 heaping teaspoon of yeast is half a packet of instant yeast.
- The milk quantity is the only ingredient that doesn't divide neatly. You'll need ½ cup plus ⅓ cup of milk.
- When pressing out the dough, make an approximately 8 x 10-inch rectangle.
- Roll the short (8") end of the log, rather than the long end, forming an 8" inch log.
Best Gluten-Free Cinnamon Rolls Recipe
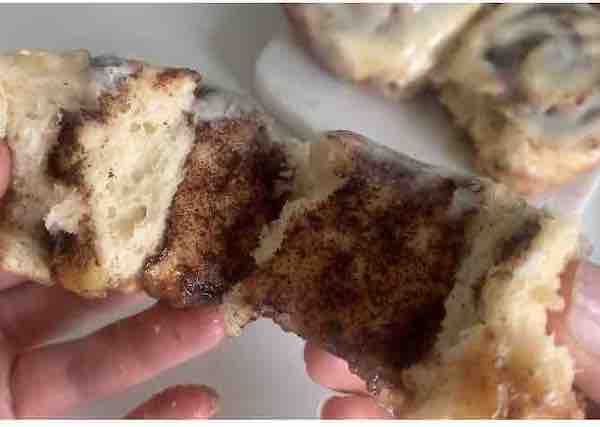
In the world of food blogging, the word "best" is thrown around fairly liberally. But, truly, these are fabulously soft and fluffy cinnamon rolls that deserve the title "best".
More importantly, in the world of gluten-free baking, we are on a quest to recreate much-loved foods that we miss. There is an emotional piece to this journey. And, thanks to innovations in gluten-free wheat starch, we can finally duplicate the taste and texture of our favorite bread-based treats so precisely.
So, I hope these cinnamon rolls make you smile. Make you beam with pride when your guests can't tell they are gluten-free. And maybe even make you cry happy tears.
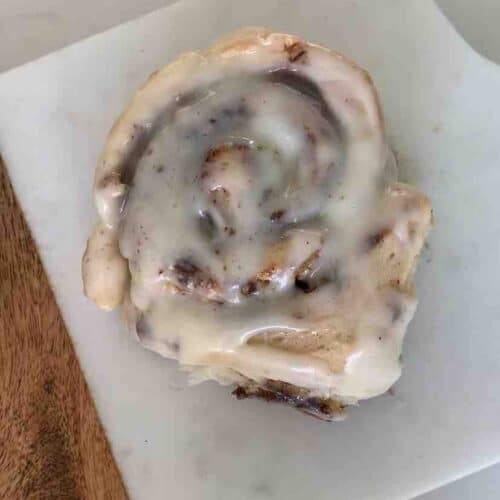
Gluten-Free Cinnamon Rolls
Ingredients
Dough Ingredients
- 4 cups + 3 Tbsp King Arthur Gluten-Free Bread Flour (500 grams) (or substitute 500g, approximately 5 ½ cups, of Caputo Fioreglut Gluten-Free Flour)
- 1 packet instant yeast (Fleischmann’s Rapid Rise Instant Yeast is gluten-free)
- 2 tablespoons sugar
- ½ teaspoon salt
- 4 tablespoons salted butter (softened at room temperature)
- 1⅔ cups room-temperature or warm milk (not hot) whole or 2%
- 2 large eggs (room temperature)
Cinnamon Sugar Filling
- 1 cup brown sugar
- 2 tablespoons ground cinnamon
- 4 tablespoons salted butter (softened at room temperature)
Cream Cheese Icing
- 4 ounces cream cheese (softened at room temperature)
- 4 tablespoons salted butter (softened at room temperature)
- 1 cup powdered sugar
- 1 teaspoon vanilla extract
- 1 tablespoon milk
Instructions
- Combine all "dough ingredients" in a stand mixer. Use the flat beater attachment to mix on low for five minutes. Stop mixer to occasionally scrape the sides of the bowl with a spatula. If the dough is too sticky, let it chill in the refrigerator for about 20 minutes.
- Place the dough on parchment paper or a silicone mat. Gently press and stretch the dough into a 10x15-inch rectangle. Add a light dusting of gluten-free flour to your work surface and hands, as needed.
- In a small bowl, combine all "cinnamon sugar ingredients" with a fork until well-mixed and crumbly. Sprinkle the mixture on top of the dough, and gently press it into the dough with your hand.
- Tightly roll the long-side of the dough to form a 15"-long log.
- Gently score the top of the log marking 11 lines to make 12 even cinnamon rolls. Use thread or unflavored dental floss to cut out the cinnamon rolls. Slide the thread under the log and toss both ends of the thread over the top of the roll. Grab each end of the floss and pull to cleanly slice off a cinnamon roll. Continue until you have 12 rolls.
- Place cinnamon rolls in a baking pan lined with parchment paper. Cover with plastic wrap. Allow rolls to rise for 2 hours before removing plastic wrap and baking. (See notes for both a quick rise option and a slow, overnight rise option.)
- Preheat the oven to 350℉. Bake rolls for approximately 25-27 minutes until lightly golden brown.
Cream Cheese Icing
- Mix all "icing ingredients" with a stand mixer (or hand mixer) until the icing is creamy. Spread over warm cinnamon rolls and serve.


